This tiny computer performs a massive range of functions, from health and fitness tracking, to making calls and sending texts and helping you navigate. Below, we’ll cover some of the Apple Watch basics for those just getting started with their watch.
Which Apple Watch Do You Have?
If you’re unsure which Apple Watch you own, here’s a quick way to find your Apple Watch model number:
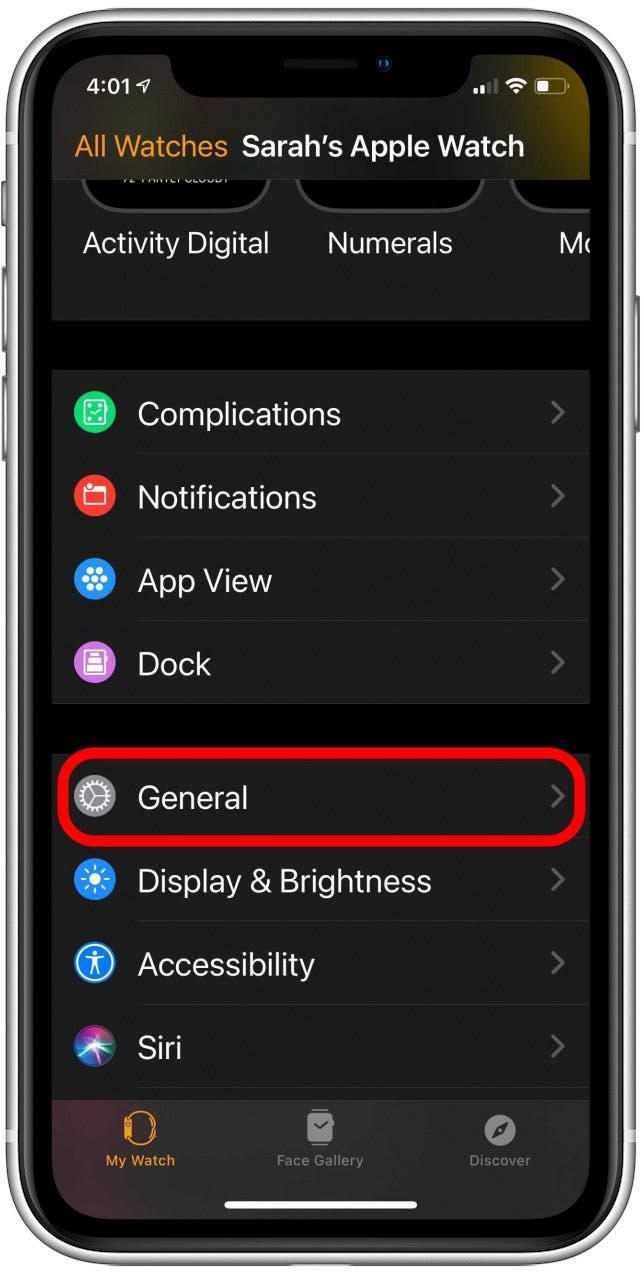
Open the Apple Watch app on your iPhone.
Tap the My Watch tab and then tap General.
Tap About.
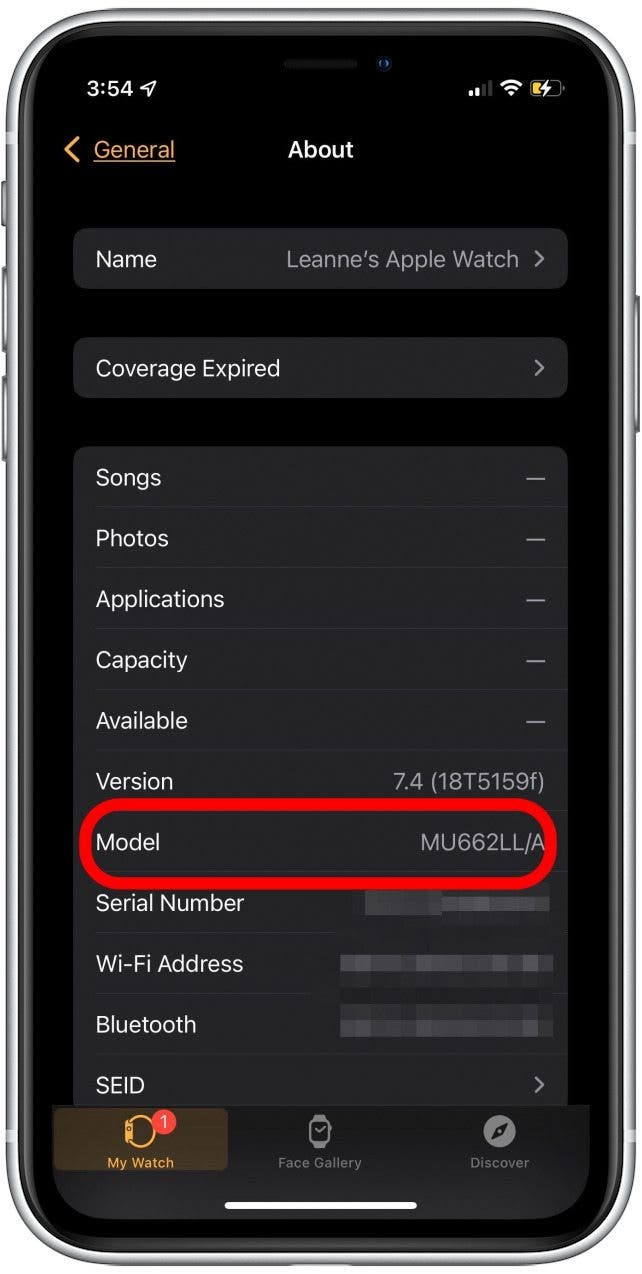
On this screen, you’ll see a section that says Model. It will contain a number in it, but you'll need to tap this number to reveal the model number.
Once you've tapped on the number, a new four-digit number preceded by the letter A will appear. This is your Apple Watch model number.
If you’re not sure which Apple Watch series this model number belongs to, you can also check out our article covering how to identify your Apple Watch.
Getting Started with the Apple Watch
Understanding Your Apple Watch Buttons
Good news! Nearly all Apple Watch models have the same buttons, which makes it easy to navigate if you upgrade. The exception to this is the Apple Watch Ultra, which has a customizable Action button.
Home Button
The two main buttons on your Apple Watch are the Home button and the Side button. The Home button is located on the Digital Crown.
Press the Home button once to go to your watch face or Home Screen.
Double-press the Home button to return to the last app you had open.
Press and hold the Home button to activate Siri.
Digital Crown
The Digital Crown is the dial on the Home button.
Turning it allows you to zoom in and out, scroll, or adjust what you see on the screen. For example: If you’re using your Apple Watch to take a photo with your iPhone, turning the Digital Crown will zoom you in and out to capture the perfect image.
Side Button
The Side button is the longer, thinner button located next to the Digital Crown.
Press the Side button to show or hide the Dock, which lists your last-used apps.
Press and hold the Side button to use the SOS or to turn your Apple Watch off and on.
Double-press the Side button to use Apple Pay.
Pro Tip: If you want to take screenshots on your Apple Watch, you can enable screenshots in your watch settings. Then, press the Home button and the Side button at the same time. Fair warning though: If you’re in the middle of a workout, it will pause the workout.
Action Button (Ultra Only)
If you own an Apple Watch Ultra, this is the orange button located on the opposite side of the Watch from your Digital Crown. The Action button can be customized to perform a wide variety of tasks, such as recording your route or turning your Watch flashlight on and off. For those who own the Ultra, we recommend checking out these cool ways to configure your Apple Watch Ultra Action button.
How Long Does It Take to Charge an Apple Watch?
According to Apple, it takes about two hours to charge your Apple Watch to 100 percent and about 90 minutes to charge the watch up to 80 percent.
The exception to this is if you own an Apple USB-C Magnetic Fast Charging cable and an Apple Watch Series 7, Series 8, or Ultra. According to Apple, this cable can charge an Apple Watch Series 7 or Series 8 from 0 percent to 80 percent in 45 minutes, and can charge an Apple Watch Ultra from 0 percent to 80 percent in an hour.
How Long Does an Apple Watch Battery Last?
The battery life of an Apple Watch varies based on use and model. Here’s Apple’s estimates for a new watch’s battery life:
Apple Watch Series 8: Up to 18 hours of battery life.
Apple Watch SE: Up to 18 hours of battery life.
Apple Watch Ultra: Up to 36 hours of battery life.
To turn on your Apple Watch, press and hold the Side button until you see the Apple logo.
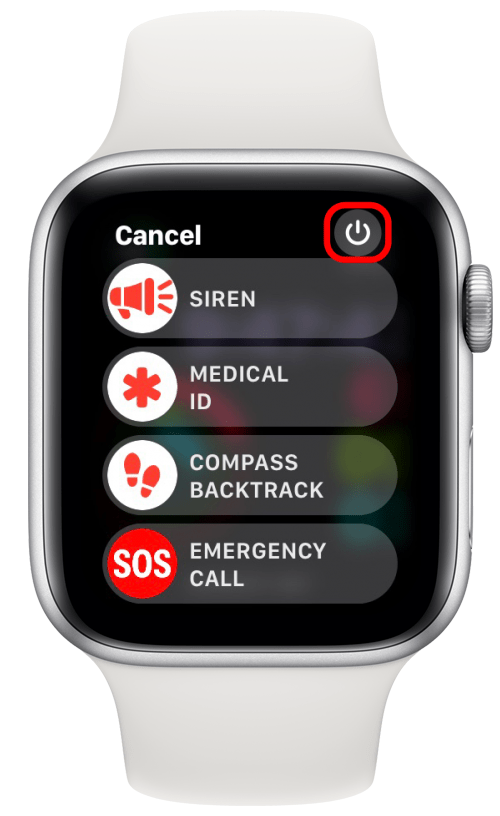
To turn off your Apple Watch, press and hold the Side button.
A screen will appear with the option call for help via SOS Emergency, view your medical ID, and more. Tap the power button in the upper-right corner.
Swipe right to power off your watch.
Troubleshooting Tip: If you ever notice lags or connectivity issues between your Apple Watch and iPhone (like your Health data not updating), try turning your watch on and off to fix the problem.
Pair Your Apple Watch to Your iPhone
Before you can use your Apple Watch, you will have to pair it with your iPhone using Bluetooth. To get started, make sure that you have a compatible iPhone running Apple’s latest operating system. If you have a first-generation Apple Watch, Series 1 or 2, you will need an iPhone 5 or later. Newer models require an iPhone 6 or later.
To pair your Apple Watch and iPhone, follow these steps:
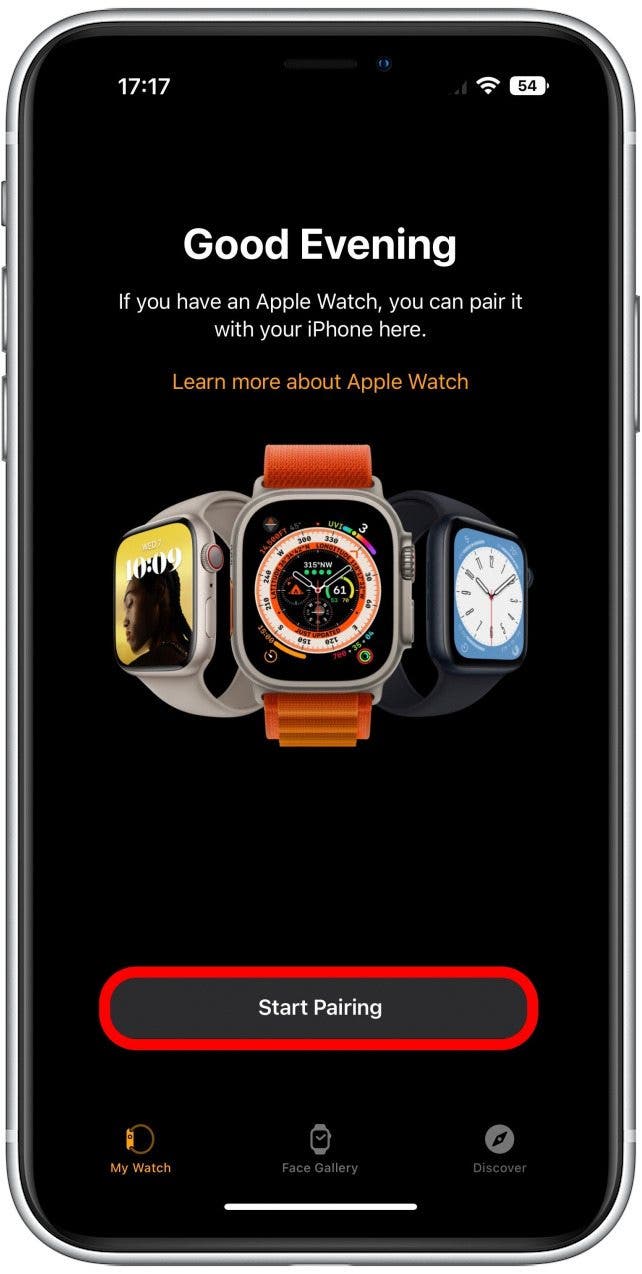
Put your Apple Watch on your wrist and hold the Side button until you see the Apple logo. Make sure to keep your iPhone near your Apple Watch.
The Apple Watch pairing screen will appear on your iPhone. If it doesn’t, open the Watch app on your iPhone, then tap Start Pairing.
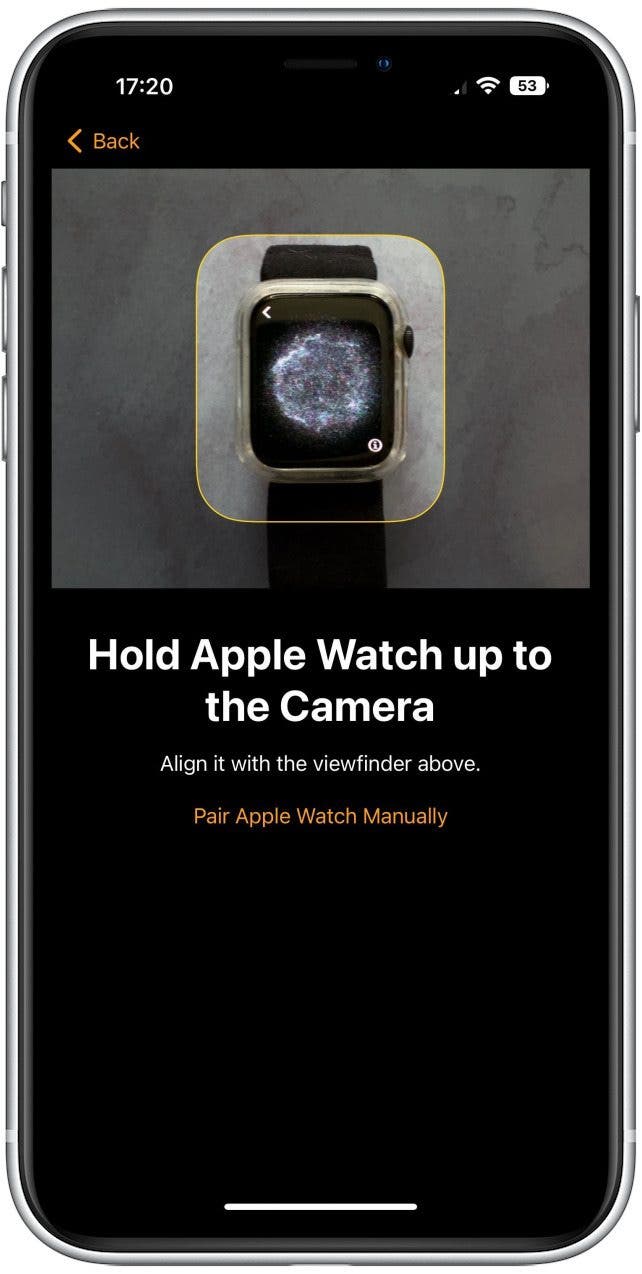
You will be prompted to position your iPhone so that the viewfinder can see your Apple Watch.
If you don’t wait to use the option above, you will also have an option to tap Pair Apple Watch Manually.
Once your Apple Watch is paired with your iPhone, you are ready to set up your Apple Watch. This will include choosing your language, agreeing to the licensing agreements, logging in with your Apple ID, enabling Siri, setting up Apple’s Diagnostics, and installing apps.
Plus, you’ll get to choose which wrist you want to wear your watch on and secure your Apple Watch with a passcode. For more detailed setup instructions, read our article explaining how to set up your Apple Watch. It’s crucial to set up a passcode for your Apple Watch to keep your data safe. While a passcode is not required unless you’ve enabled Apple Pay, it is highly recommended that you use one. If you would like to change your Apple Watch passcode later on, follow these steps:
Useful Apple Watch Gestures
Even if you’re already familiar with these Apple Watch gestures and their functions, it’s still worth reading through the list to review! While pretty straightforward, these Apple Watch gestures are the key to easy navigation, and knowing how to properly use them will help you to more easily accomplish what you need.
Tap to Wake
Tapping is the most common gesture on your Apple Watch. Tapping selects a button or an item. Tapping your watch display will also bring the screen to full brightness on watch models with Always On display.
Tap & Hold for Hidden Features
The tap and hold gesture is also known as force press. You can do it to see the options in an app. Not all apps have tap and hold actions, but some use them to reveal hidden features.
In the Maps app, you can tap and hold to put down a pin. In the Messages app, tapping and holding a message allows you to post a reaction. On your watch face, this lets you edit your watch face, share it with a contact, or change between watch faces.
Drag to Adjust
Dragging your finger across the screen allows you to adjust a slider, scroll, move across a map, or browse app icons on your Home Screen.
Swipe to Change Faces
Swiping is similar to dragging but is generally a quicker motion. You can swipe up, down, left, or right. You can swipe left or right on your watch face to switch between watch faces. Swiping up shows you the Control Center. Swiping down shows your notifications. You can swipe left on the notifications to close them.
Cover to Silence
To silence your watch, you can cover the display with your hand. This is an excellent discreet option if you’re in a meeting and don’t want to have to pause to fiddle with your Apple Watch buttons.
Texting & Calling on Your Apple Watch
The Apple Watch is a valuable tool for communication. If you have a Wi-Fi watch, you will need to have your iPhone within Bluetooth range and have access to cellular service and the internet to use your watch to send and receive texts and calls. A cellular Apple Watch can make calls and send messages independent of an iPhone.
Texting on Your Apple Watch
You can use your Apple Watch to send and receive texts. You can also view all your text messages directly on your iPhone. Any text that is on your iPhone’s Messages app will also be stored on your Apple Watch.
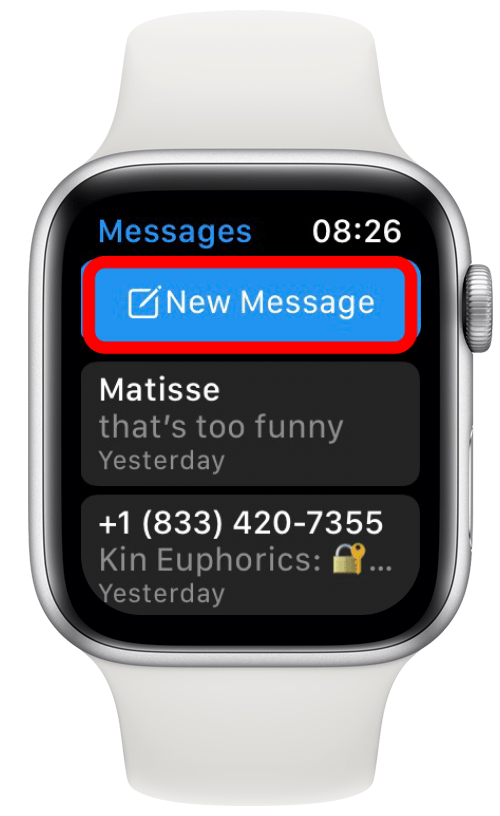
Swipe down to reveal New Message at the top and select it.
Tap Add Contact. From here, you can dictate the name of an existing contact, type in a new number, or scroll through your contacts. You will also see your recent contacts.
In the Create Message section, write your message then tap Send.
Calling on Your Apple Watch
Your Apple Watch can make phone calls just like your iPhone! When you make or receive a phone call on your watch, you will be on speaker unless your watch is connected to Bluetooth headphones.
To call a saved contact on your Apple Watch:
Select a contact in the Phone app.
Tap the phone icon.
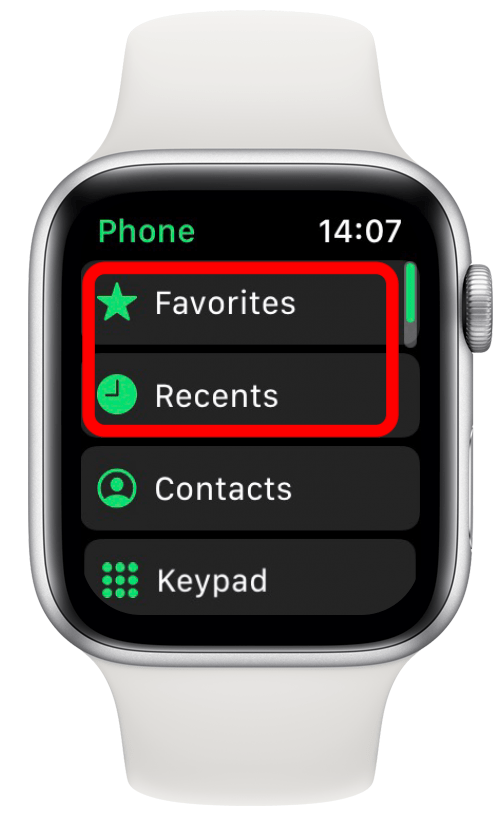
If you are calling a recent or favorite contact, you only need to tap their name once from the Recent or Favorite tab to call them.
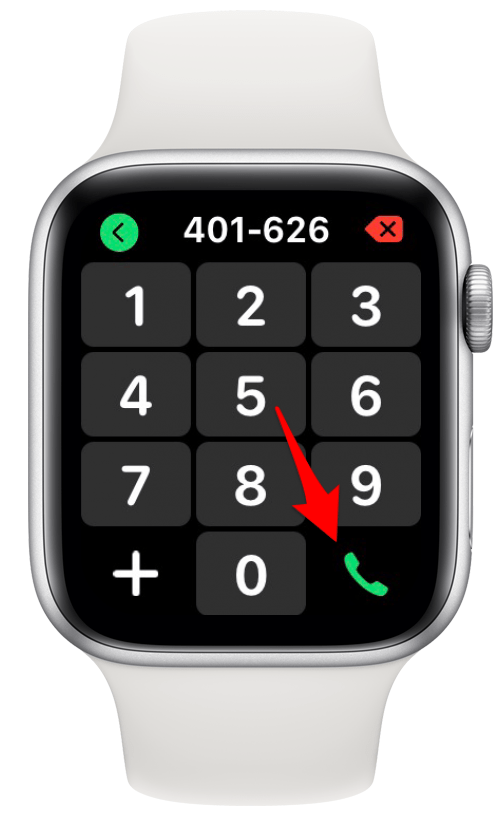
To call an unsaved number on your Apple Watch:
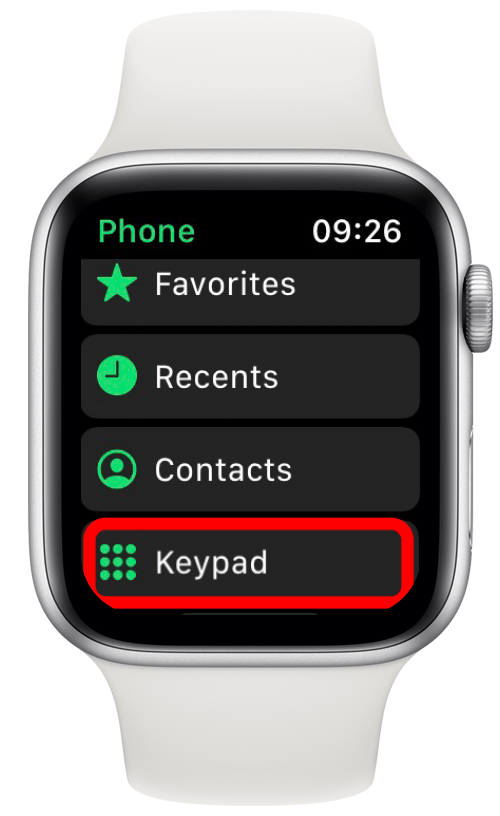
On your Home Screen, tap Phone.
Tap Keypad.
Enter the number. Tap the receiver icon.
Apple Watch Health & Fitness Basics
The Apple Watch is a great tool for tracking your fitness. There are many ways to use the Apple Watch to get more familiar with your body and motivate you to live a more active lifestyle. Some of the more basic features include setting goals, tracking workouts, and understanding how your heart rate, sleep cycle, and blood oxygen reflect your overall health.
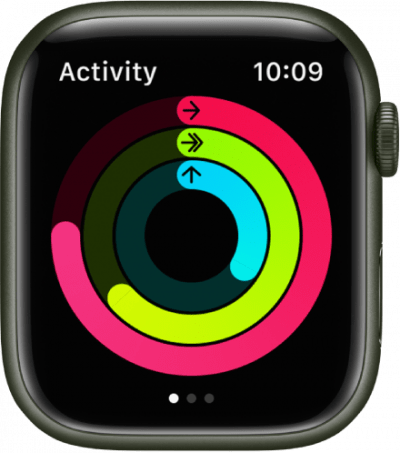
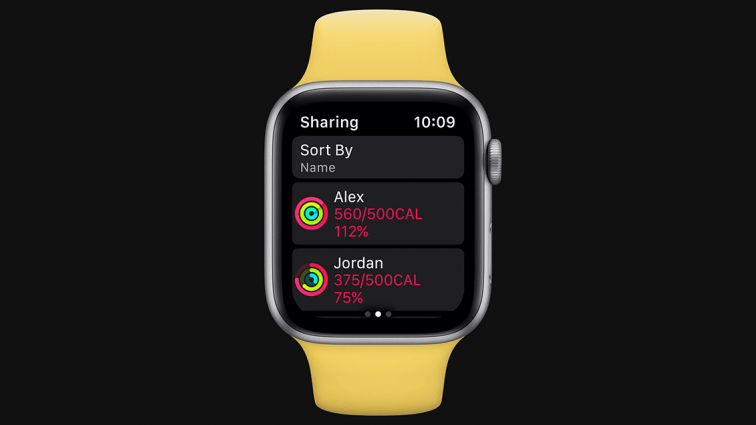
Tracking Activity Rings
Activity Rings allow you to set goals and track them daily, short-term, and long-term.
How do Activity Rings Work?
The Activity Rings are three circles that show your Move, Exercise, and Stand progress. The outer red ring is your Move goal, the middle green ring is your Exercise goal, and the central blue ring is your Stand goal.
Move Activity Ring
The red Move ring measures the active calories you burn per day. Your body is burning calories 24/7, even if you are lying down or sleeping.
The Move ring on your Apple Watch will show you the active calories you burn throughout the day. This means that it only tracks the extra calories you burn by walking, moving, standing, and exercising.
Exercise Activity Ring
The green Exercise ring measures the minutes of exercise that you do throughout the day. Depending on the activity that you are doing, this may be measured by calculating your heart rate, pace, or other factors.
The exercise minutes are tracked when your level of activity equals or exceeds a brisk walk. So while a leisurely walk might not count towards your exercise minutes, a frenzied house-cleaning spree may help you reach your goal.
Stand Activity Ring
The blue Stand ring measures the hours per day that you stand. This doesn’t mean that you need to stand for the entire hour. The goal is to stand and move for a full minute every hour of the day.
Change Your Activity Goals
You can change your Move, Exercise, and Stand goals any time! To do this:
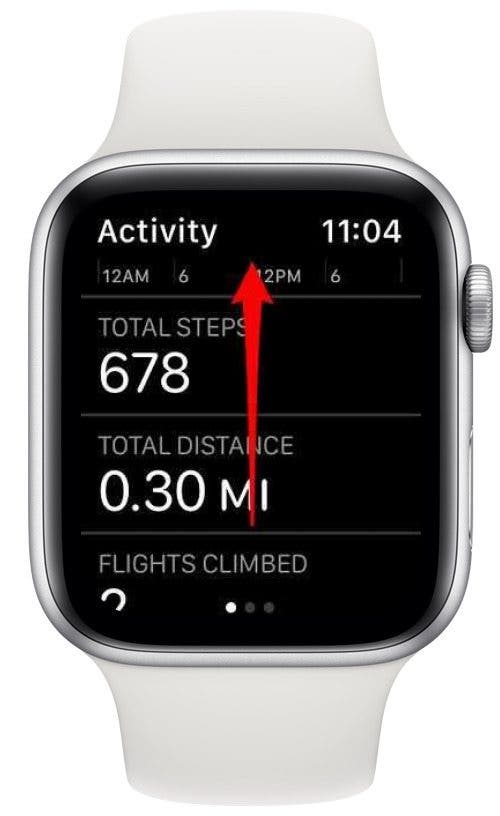
On your Apple Watch, open the Activity app by tapping on it.
Swipe up on the Activity summary screen for options.
Tap Change Goals.
View Your Activity Goals
If you want to see the Activity Rings on your Apple Watch, open the Fitness app from your Home Screen.
Additional Resource: If you love keeping track of your Activity Ring progress throughout the day, you can also customize an Apple Watch face to view them right on your Home Screen.
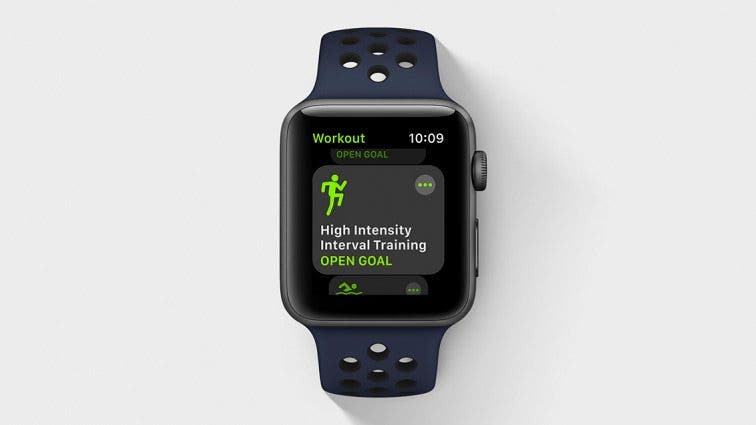
Tracking Workouts on Apple Watch
The Apple Watch has a convenient Workout app to track all your activities. You can pick from a wide variety of sports and exercises.
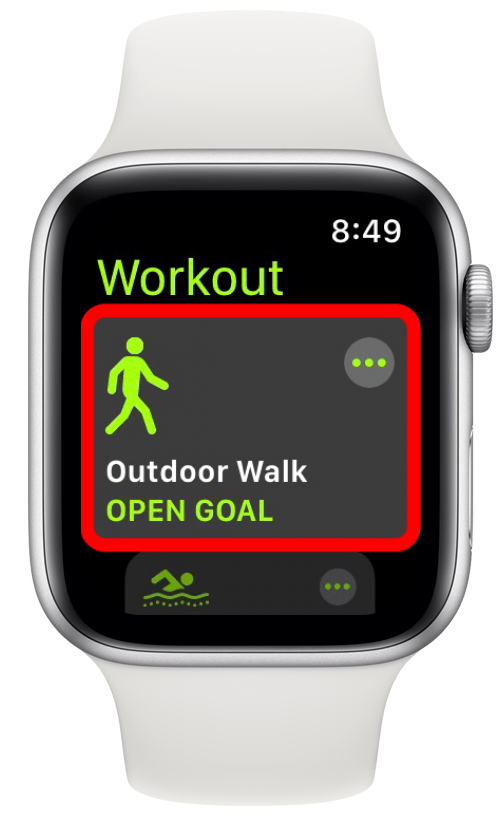
Starting a Workout on Your Apple Watch
Open the Workout app and tap the activity you’ll be doing.
Some will ask you some follow-up questions. For example, if you are swimming in a pool, your watch will ask you how big the pool is.
You will have a three-second timer, and the workout will begin.
Some workouts will detect if you stop doing them and remind you to pause or end the workout. Other times, if you start working out and forget to start the Apple Watch workout, your watch may track it anyway and remind you to start it.
Adding a Workout Manually
Every Apple Watch owner has had the experience of forgetting to wear their watch or start tracking their workout. If this happens, don’t worry, you can still get that digital credit! You can manually add an Apple Watch workout to your iPhone’s Health app, which is where your Apple Watch workout data is synced.
Open the Health app on your iPhone and select the Browse tab.
Tap the Search bar and enter the word Workouts. Select Workouts from the list of results.
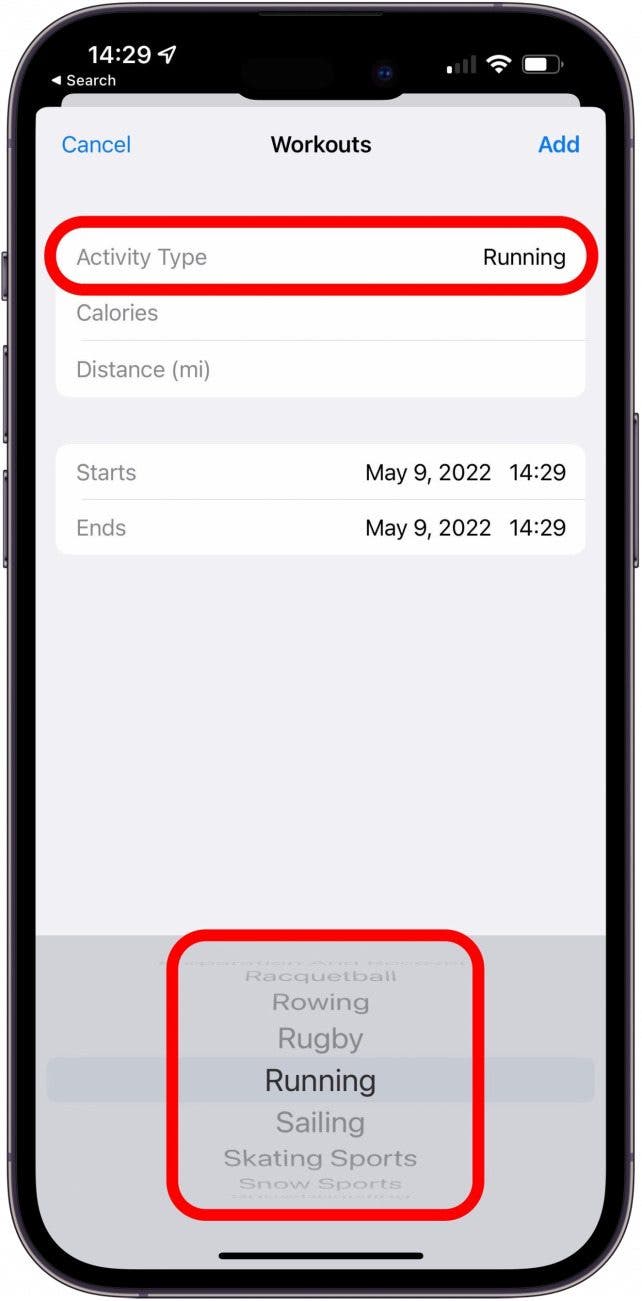
On the top right, tap Add Data.
Choose your activity type, then enter the number of calories and the start and stop times.
When you're finished, tap Add.
Tracking Sleep
Sleep tracking is an exciting function of your Apple Watch because analyzing our sleep can help us make healthier decisions. To set up sleep tracking and sleep goals:
Open the Health app on your iPhone, and tap Sleep.
Tap Get Started then tap Next.
Set a sleep goal using the plus and minus buttons, then tap Next.
Set your first schedule by dragging the bed to the time you want to go to bed and the alarm to the time you want to wake up.
You can select and deselect the days that you want it to be active. This is where you can also enable a Wake Up Alarm, choose the Sounds & Haptics, and toggle Snooze.
You can always add a schedule for other days, even if you have a different schedule set for every day. Tap Add.
Tap Enable Sleep Mode to automatically turn on Do Not Disturb at your scheduled bedtime or choose to skip.
Tap Enable to track sleep with Apple Watch. Tap Done to save and close.
Want to see your sleep statistics? Tap Sleep in your Health app to view your sleep data by week or by month. Tap Show More Sleep Data for more information. If you want to learn more about heart rate dip and other valuable sleep metrics, you can also learn more about Apple Watch Sleep tracking.