


Let’s talk about the core services and apps used across all your Apple devices: Apple ID, iCloud, and Find My. At any given moment, each of these services are running quietly in the background, helping you to easily manage your data and keep track of your devices. These services are integrated throughout your devices and apps, and are the fundamental building blocks underlying nearly everything you do on your Apple devices.
Knowing how to properly manage and make use of these services can massively improve your experience and make your devices even more helpful and convenient to use. Before diving in, let’s quickly clarify the purpose of each of these services:
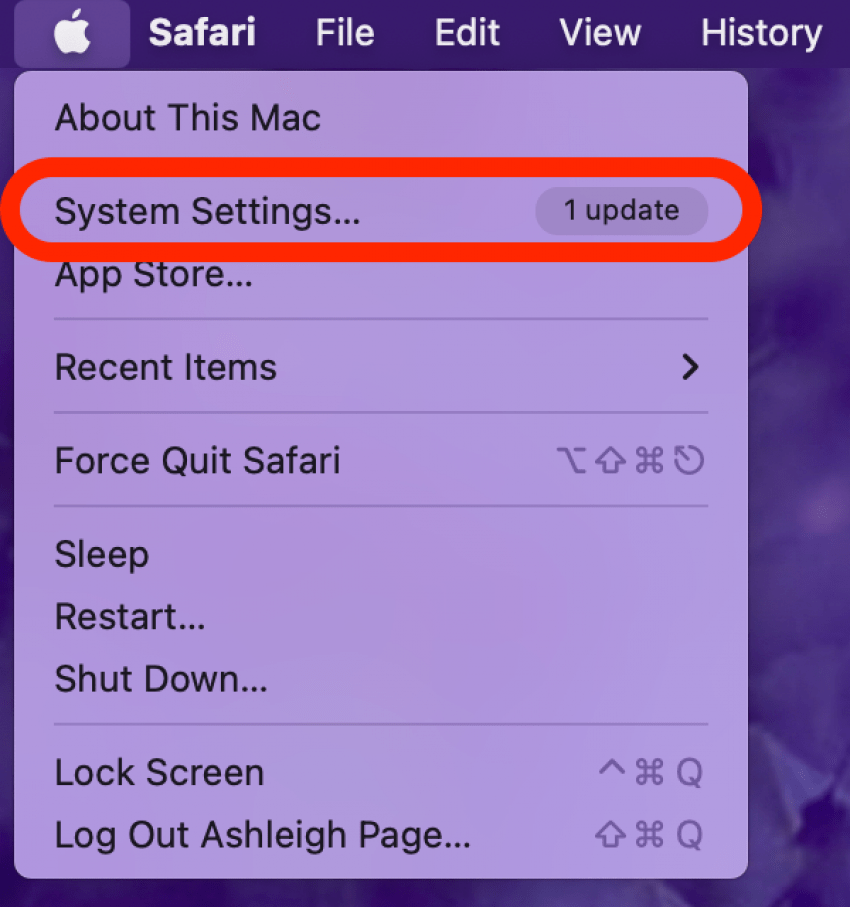
The most important tool for any Apple user, besides the hardware itself, is the Apple ID.
Your Apple ID provides access to all of Apple's services. Put simply, your Apple ID is a single credential that signs in to any Apple service or account, including Apple Music, iCloud, as well as the app stores for different Apple devices. Using this single login, you have a simple way to have all your data across devices stored under a single account.
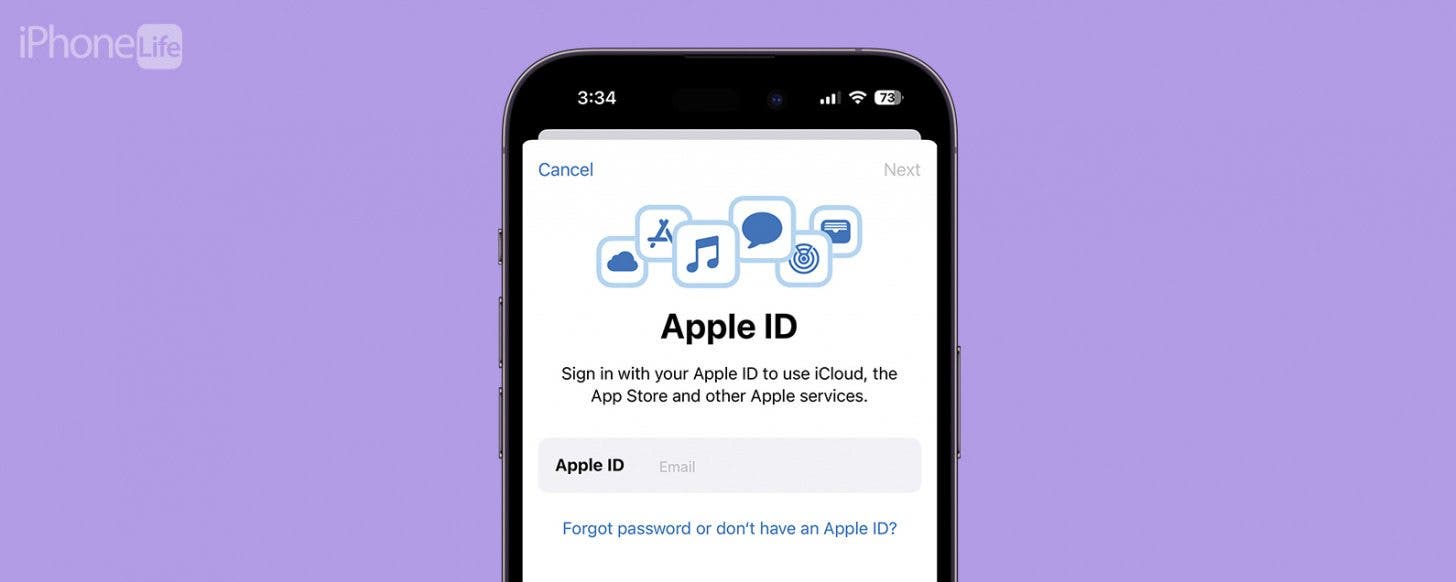
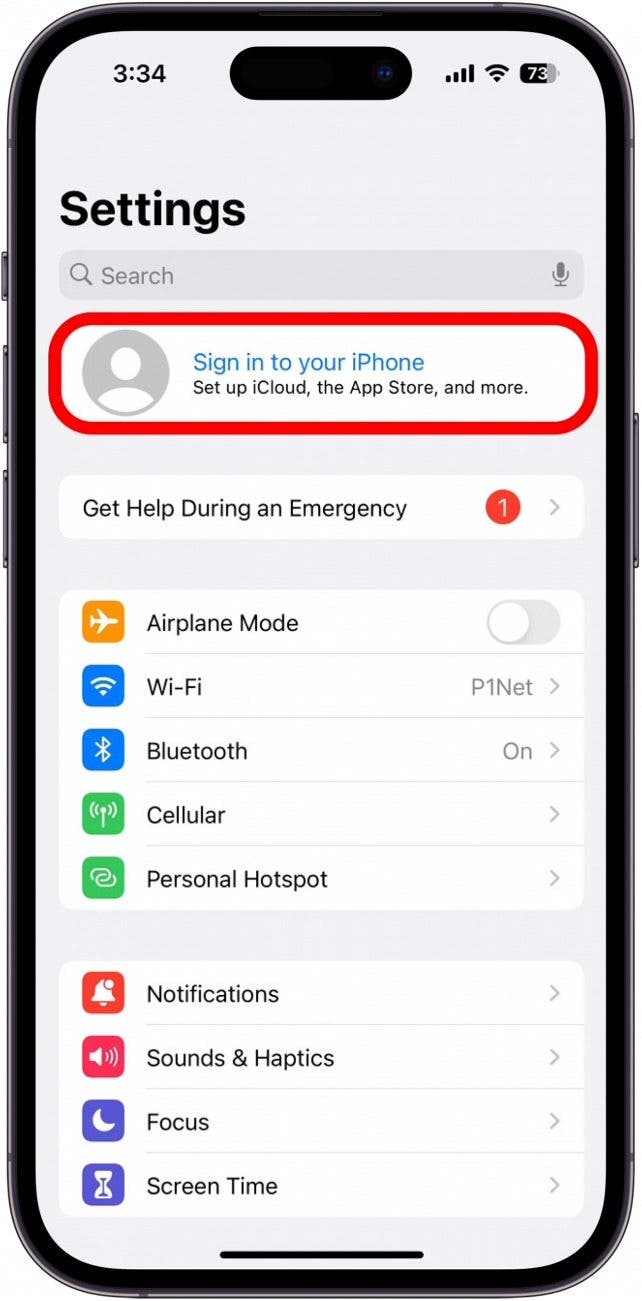
You likely set up an Apple ID account or signed in with your existing account when you set up your device for the first time. But if not, then you can create an account or sign in to your account later in Settings. If you're creating an Apple ID account for the first time, here's what you'll need:
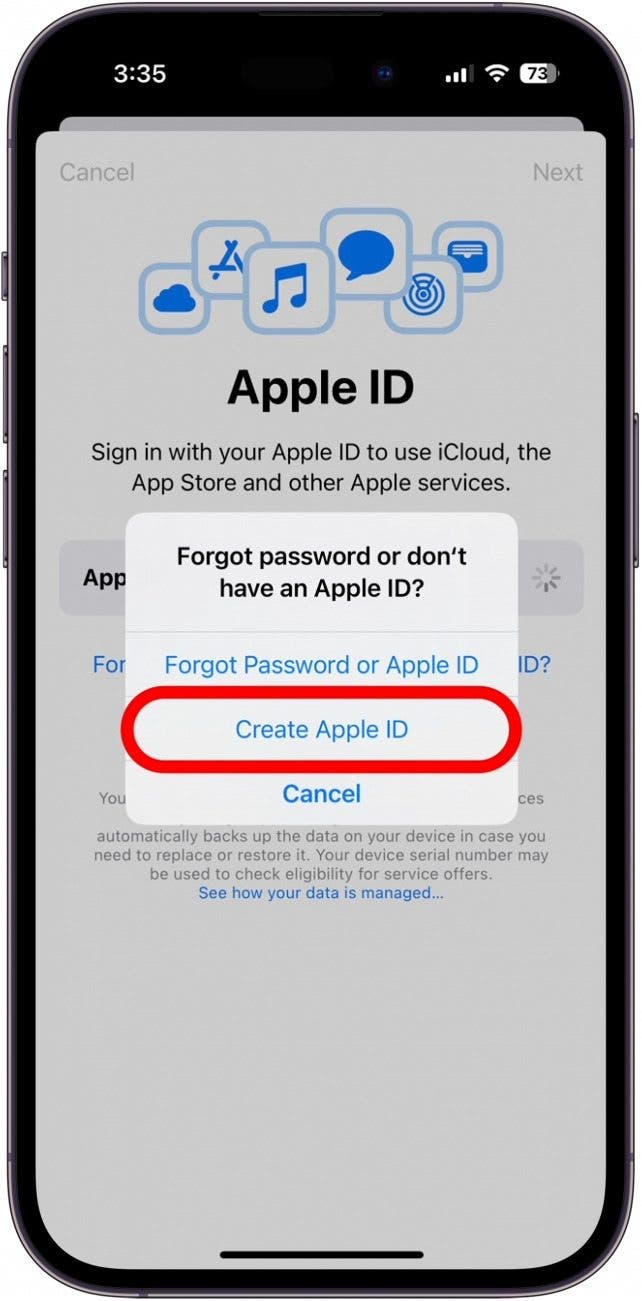
To create a new Apple ID account:
To sign in to an existing Apple ID account:
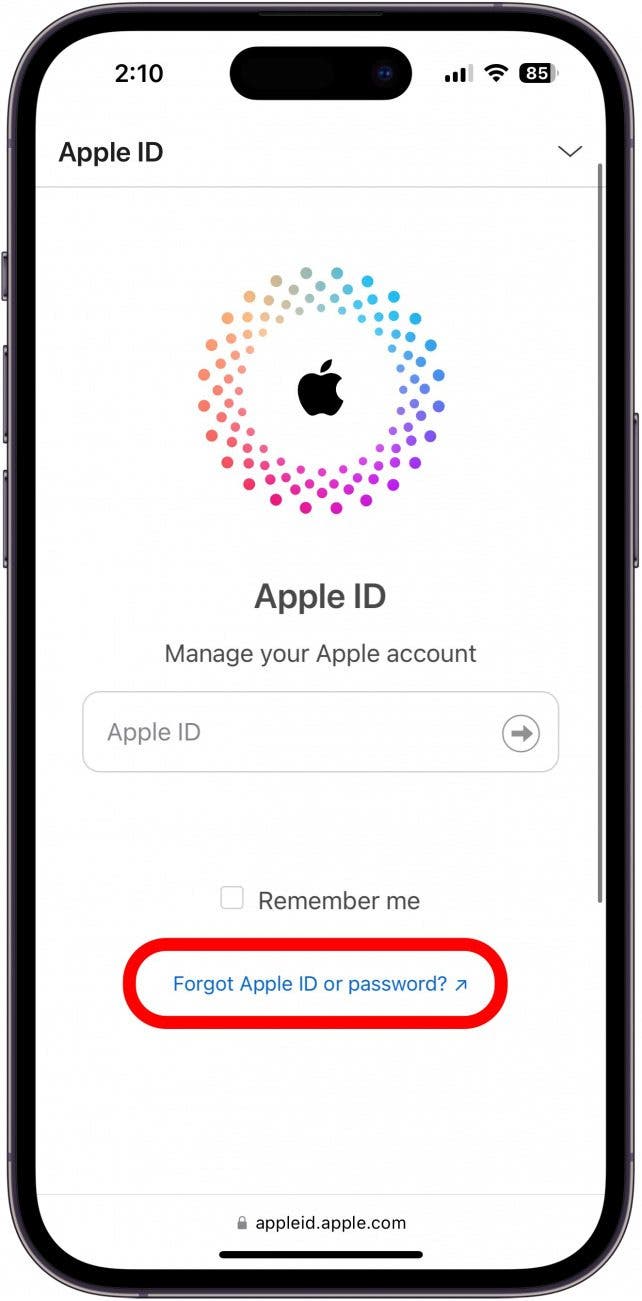
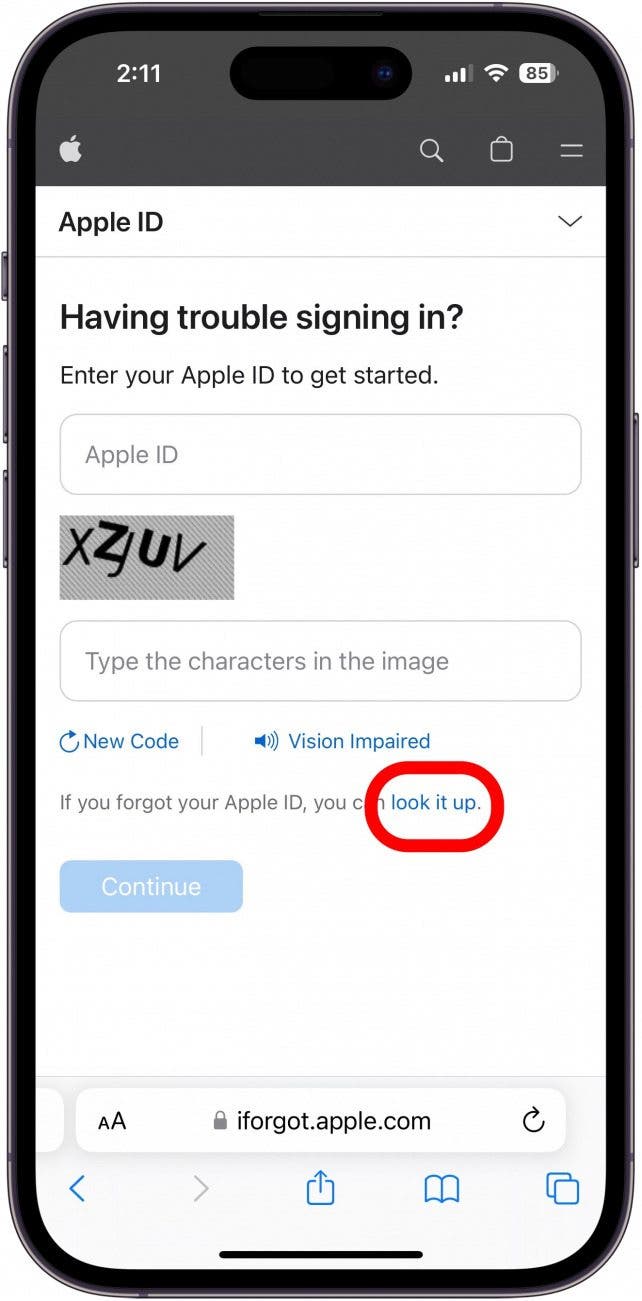
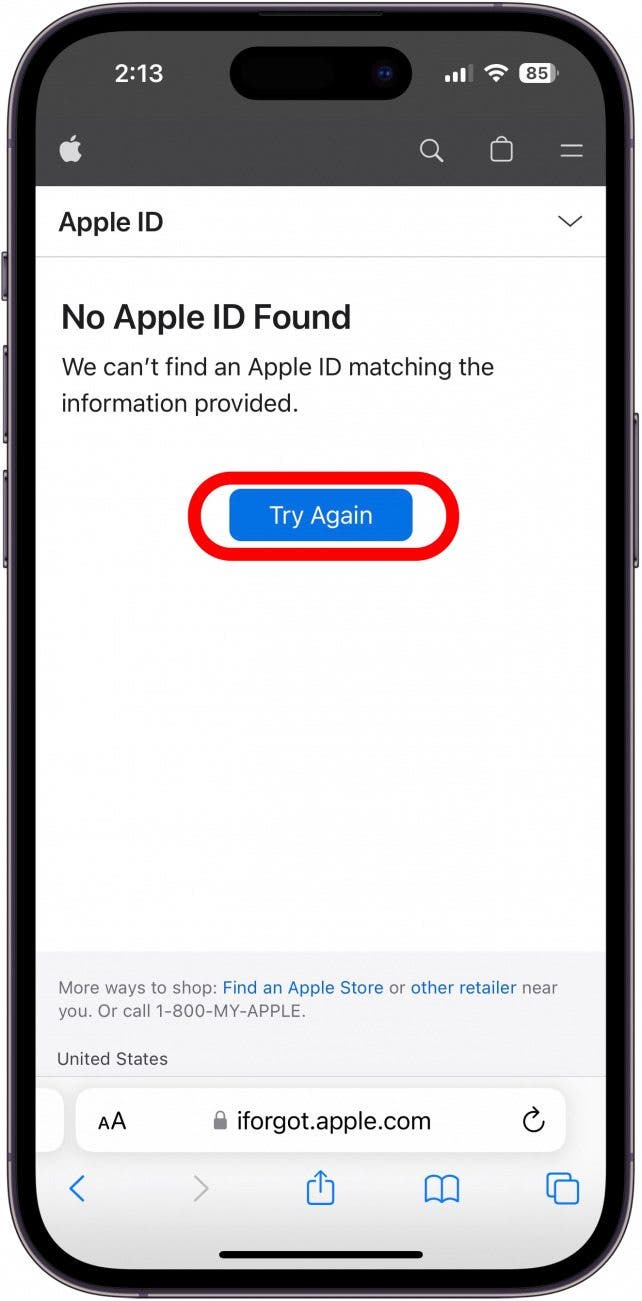
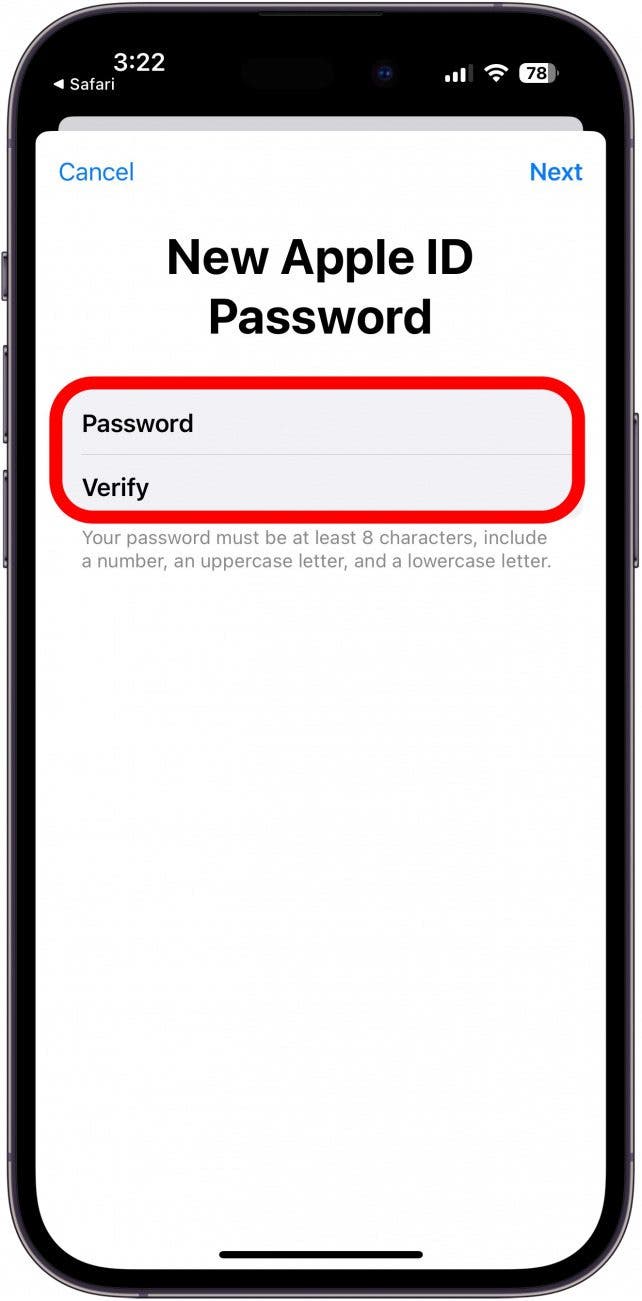
Despite our best efforts, sometimes we forget our Apple ID. If that happens, here’s how to reset your Apple ID password:
Now you know how to reset a lost Apple ID! To avoid this in the future, it's best to keep a copy of your Apple ID and Apple ID password somewhere safe, such as where you keep your passport.
If you've added another email account and you'd like to include it in your Apple ID so that more people can find you on Find My Friends, FaceTime, and iMessage, it won't take but a minute. Removing a phone number or email address is just as easy. To begin:
Whenever you sign in to a new device with your Apple ID, it will automatically appear on your account page with the other devices you're signed in with.
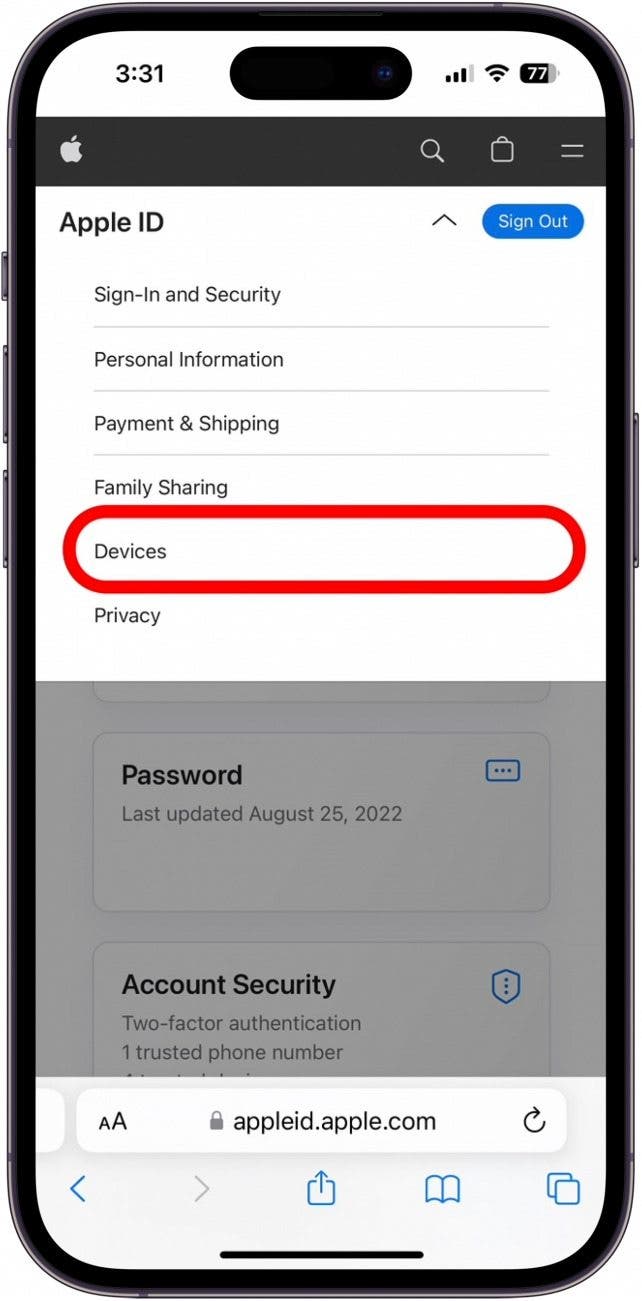
If you see a device on your account page that you don't recall signing into with your Apple ID, if there's a device you no longer use, or if you've lost one of your devices, you'll want to remove it from your list. Removing lost, stolen, and unused devices from your account page will help you ensure that no one can see verification codes sent by two-factor authentication. It will also help to make sure no one can use your iCloud, iTunes, or other Apple services and accounts. To remove a device from your account page:
Note: If you have Apple ID questions that weren’t answered here, check out our Apple ID article covering how to resolve common Apple ID issues (such as accidentally creating two Apple IDs for yourself).
iCloud has been around for a while now, and it still baffles even the most tech-savvy users. After all, iCloud encompasses a wide range of features, from iCloud Photo Library to Find My iPhone to Family Sharing. But at its most basic level, iCloud is a service designed to safely store your data in the cloud.
The “cloud” is just a section of Apple's servers devoted to your Apple ID. You can use that storage space for photos, files, and music. Once you've created an Apple ID, you automatically have some iCloud storage attached to it. iCloud is extremely useful for syncing data between your computer and iPhone and for restoring your data to a new iPhone when it's time to upgrade or if your phone gets lost or damaged.
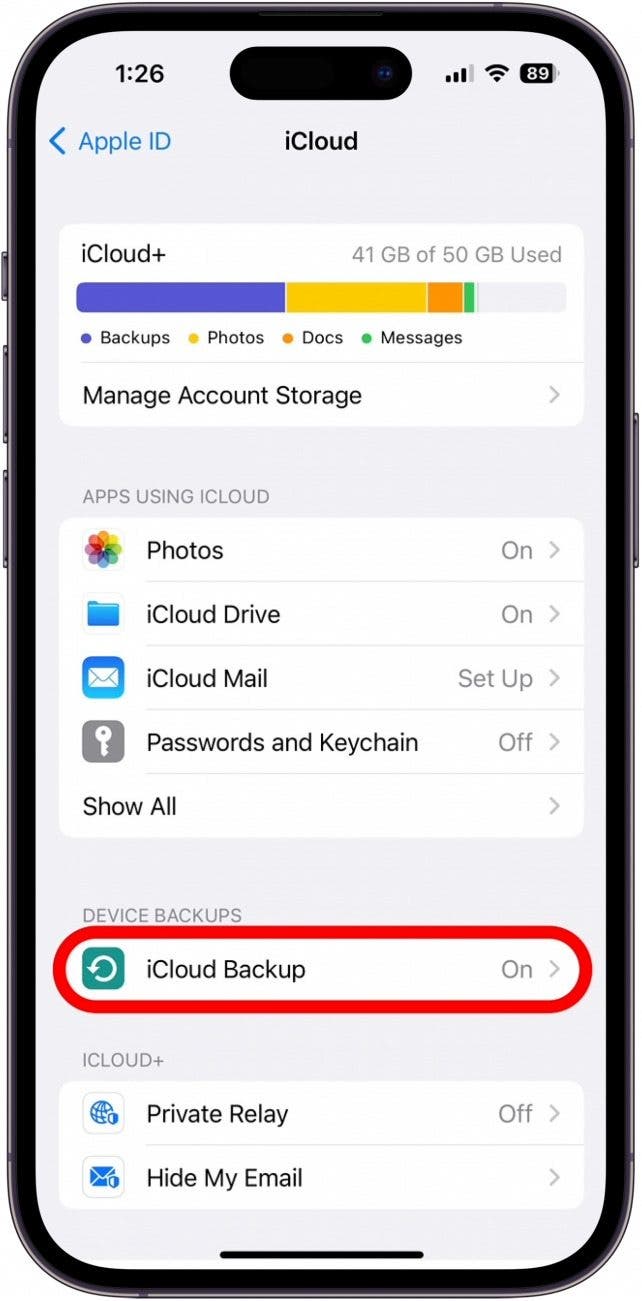
By automatically backing up your iPhone to your iCloud storage, your iCloud can ensure that you never lose important information on your device. To turn on automatic iCloud backups:
Now your content will back up to Apple's servers every night, so long as your device is plugged in and connected to Wi-Fi.
Your iCloud can keep your email, photos, and other personal data synced across your Apple devices. For example, you can have notes or reminders you create in the Notes and Reminders apps synchronize with those same apps on your iPad or Mac.
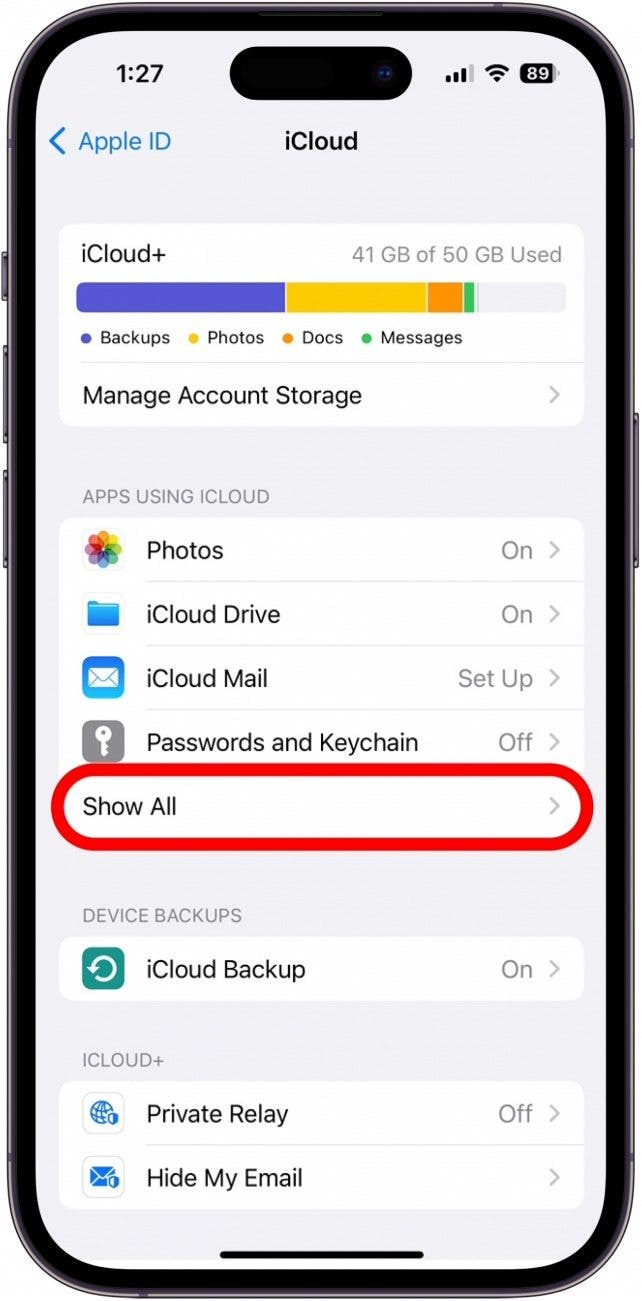
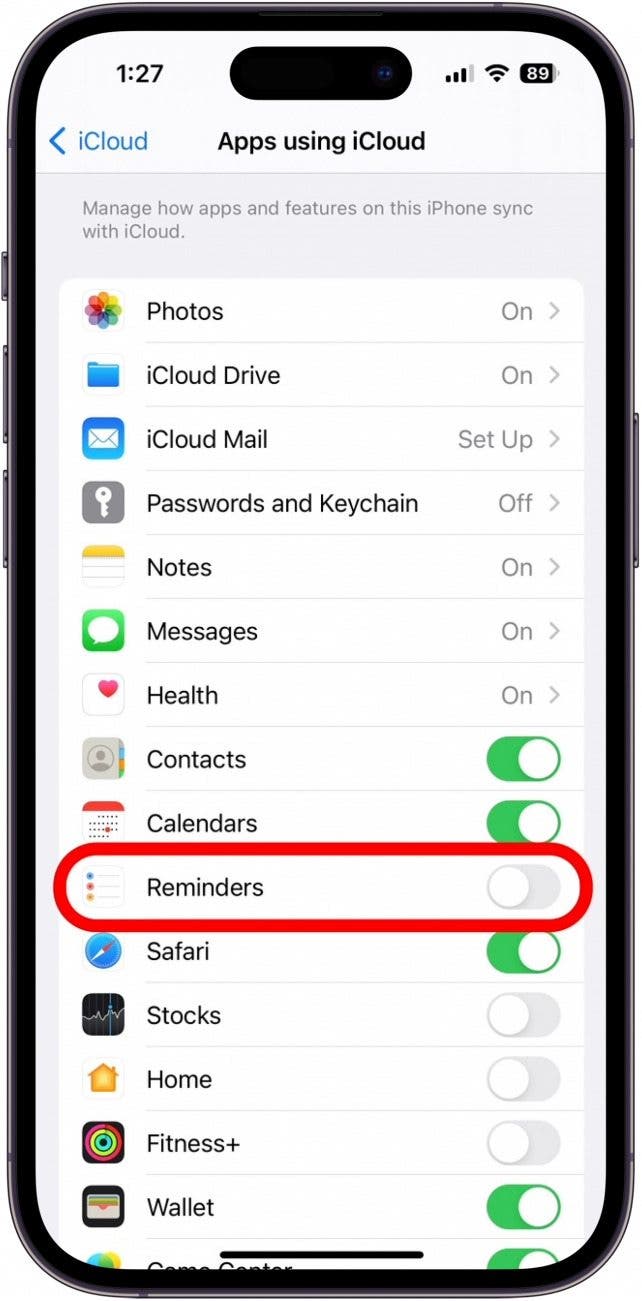
To turn on iCloud services for a particular app:
To sync that data to another device, log in to the same Apple ID on that device, and activate iCloud sync. These steps will be the same for both iPad and iPhone.
To sync data on your Mac:
We recommend at least enabling Photos, Contacts, Notes, Find My, and Calendars, as these often contain data you don’t want to lose.
If you've filled up your free 5 GB of iCloud storage and don't have room for a backup, you can pay for more, starting at $0.99 per month for an additional 50 GB. To purchase more iCloud storage:
If you just have one iOS device, the free 5 GB plan or the cheap 50 GB plan ($0.99 per month) will likely suffice. With the 50 GB plan, you'll have room to store a limited photo collection and some files, especially if you also use a service like Dropbox or Google Drive for some of your storage needs.
You might be interested in the 200 GB tier of storage if you have a lot of photos and you don't want to bother to offload them onto your computer. Finally, for those with a stable of iOS and other Apple devices and loads of media, the 2 TB plan costs $9.99 per month. The larger tiers of storage (200 GB and 2 TB) are also great for Family Sharing plans, where multiple family members share the same storage plan.
Pro Tip: Many people don’t realize you have the option to share storage plans, purchases, and service subscriptions with family members. If your family is currently paying for multiple iCloud, Apple Music, or other subscriptions, setting up a Family Sharing plan or signing up for an Apple One subscription (to bundle your Apple services under one monthly fee) can significantly reduce the amount you pay each month.
Apple's Find My app (formerly Find My iPhone) enables you to locate any of your devices instantly, so if you're wondering what to do if you lost your phone or how to locate a lost iPad, the Find My feature is all you need.
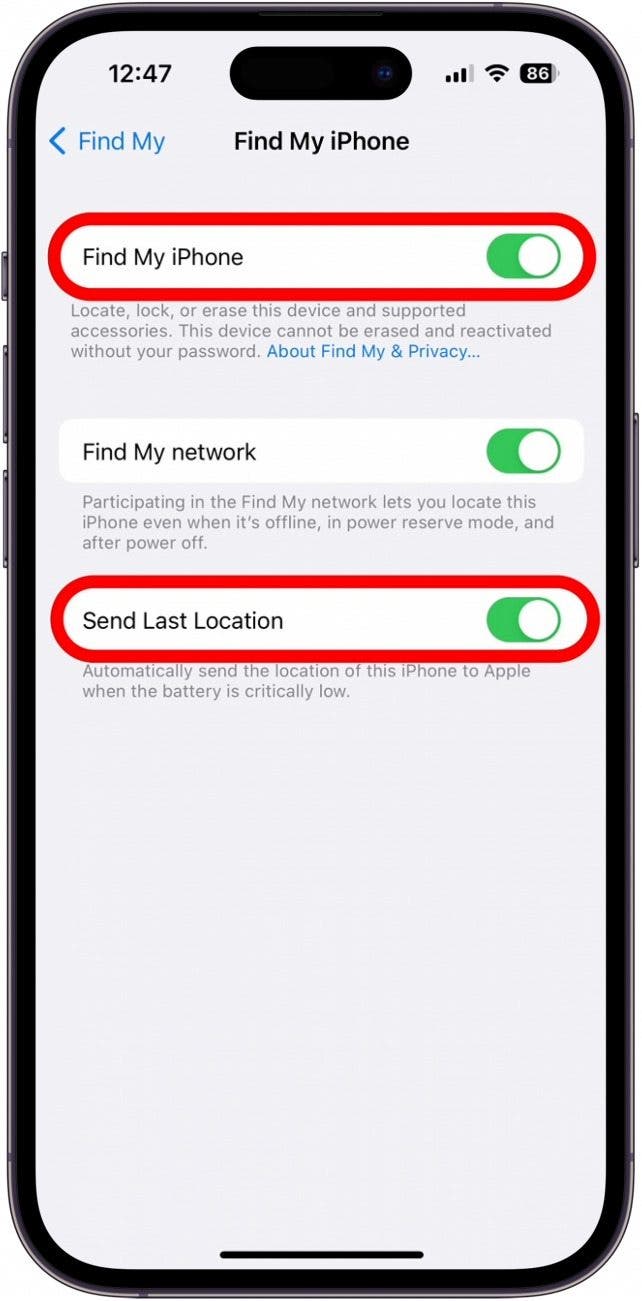
First, make sure Find My is enabled on your Apple devices, so you can actually use this device-saving feature if you misplace one of your Apple products.
Note: The Find My app comes automatically installed on your phone, so you just have to enable it.
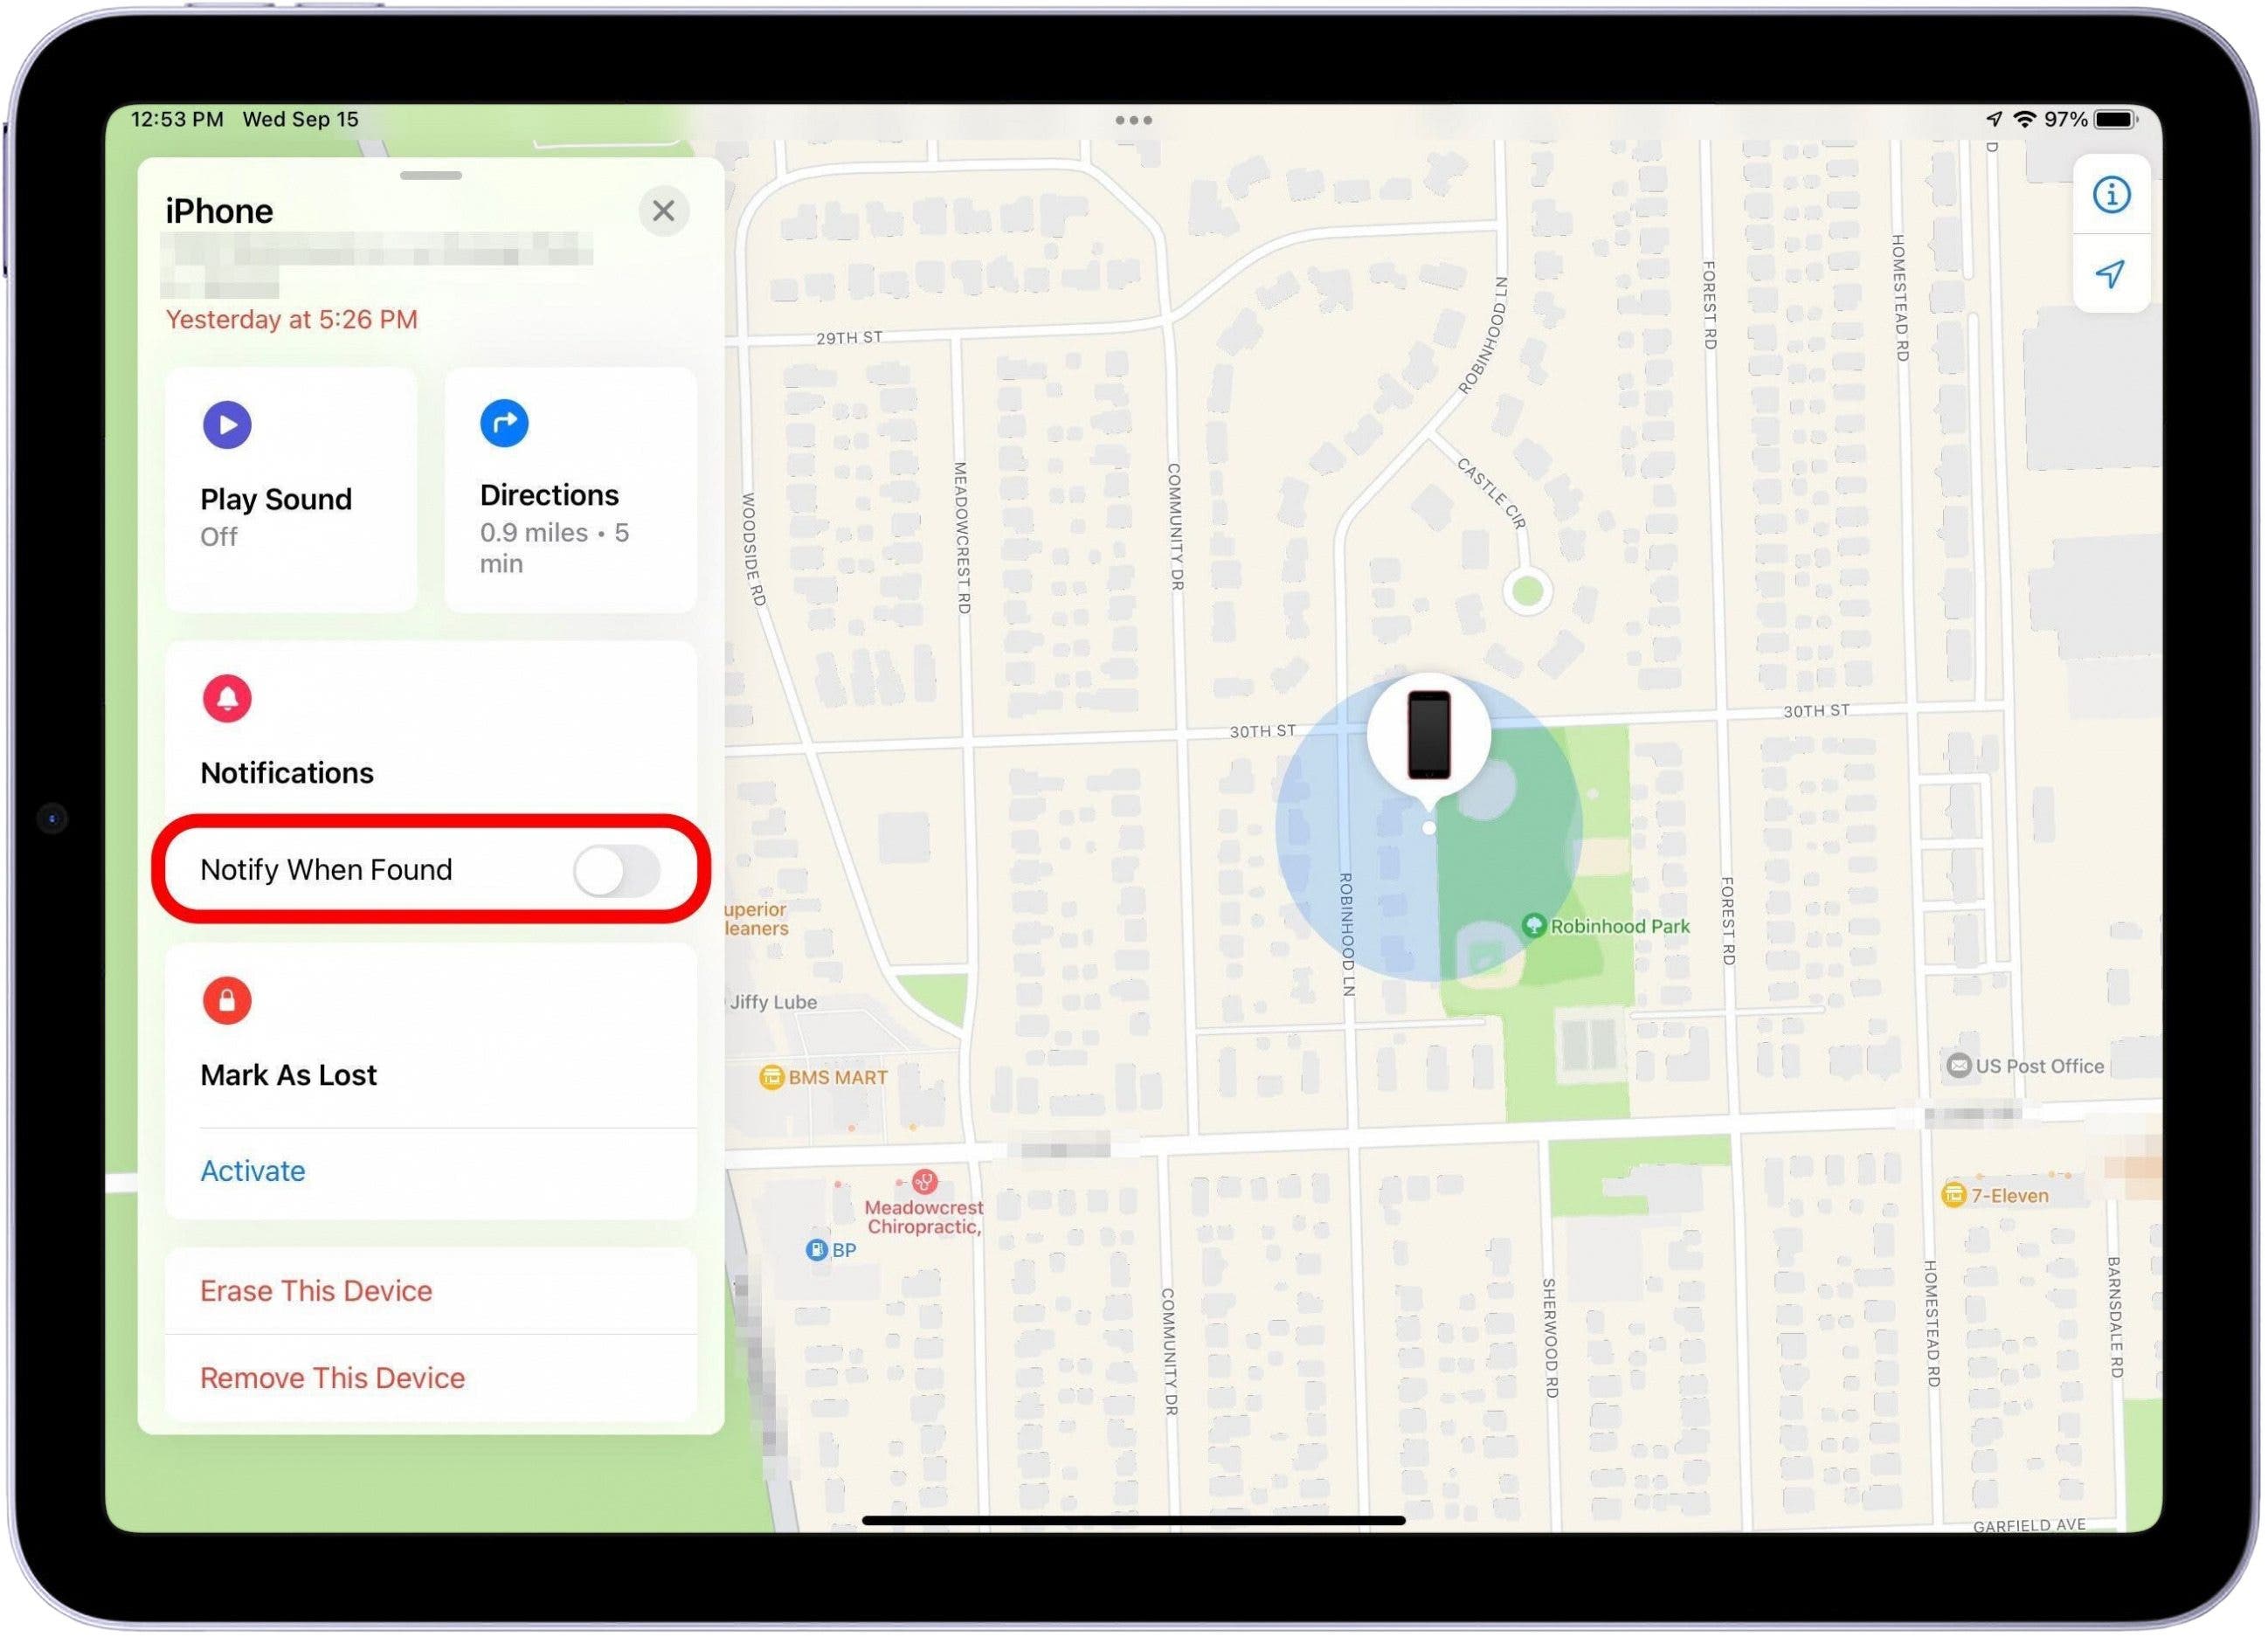
This super-helpful feature will make sure you don’t leave the local coffee shop (or any other location) without your Apple devices. What makes the Notify Me, Except At feature shine is the ability to add exceptions. For example, you might set this feature to notify you if you leave your iPad somewhere, except when you leave your home or work. To set up location-based alerts:
We find these alerts incredibly useful, especially on our busy days. However, if you find these alerts annoying, you can also easily disable Device Left Behind alerts.
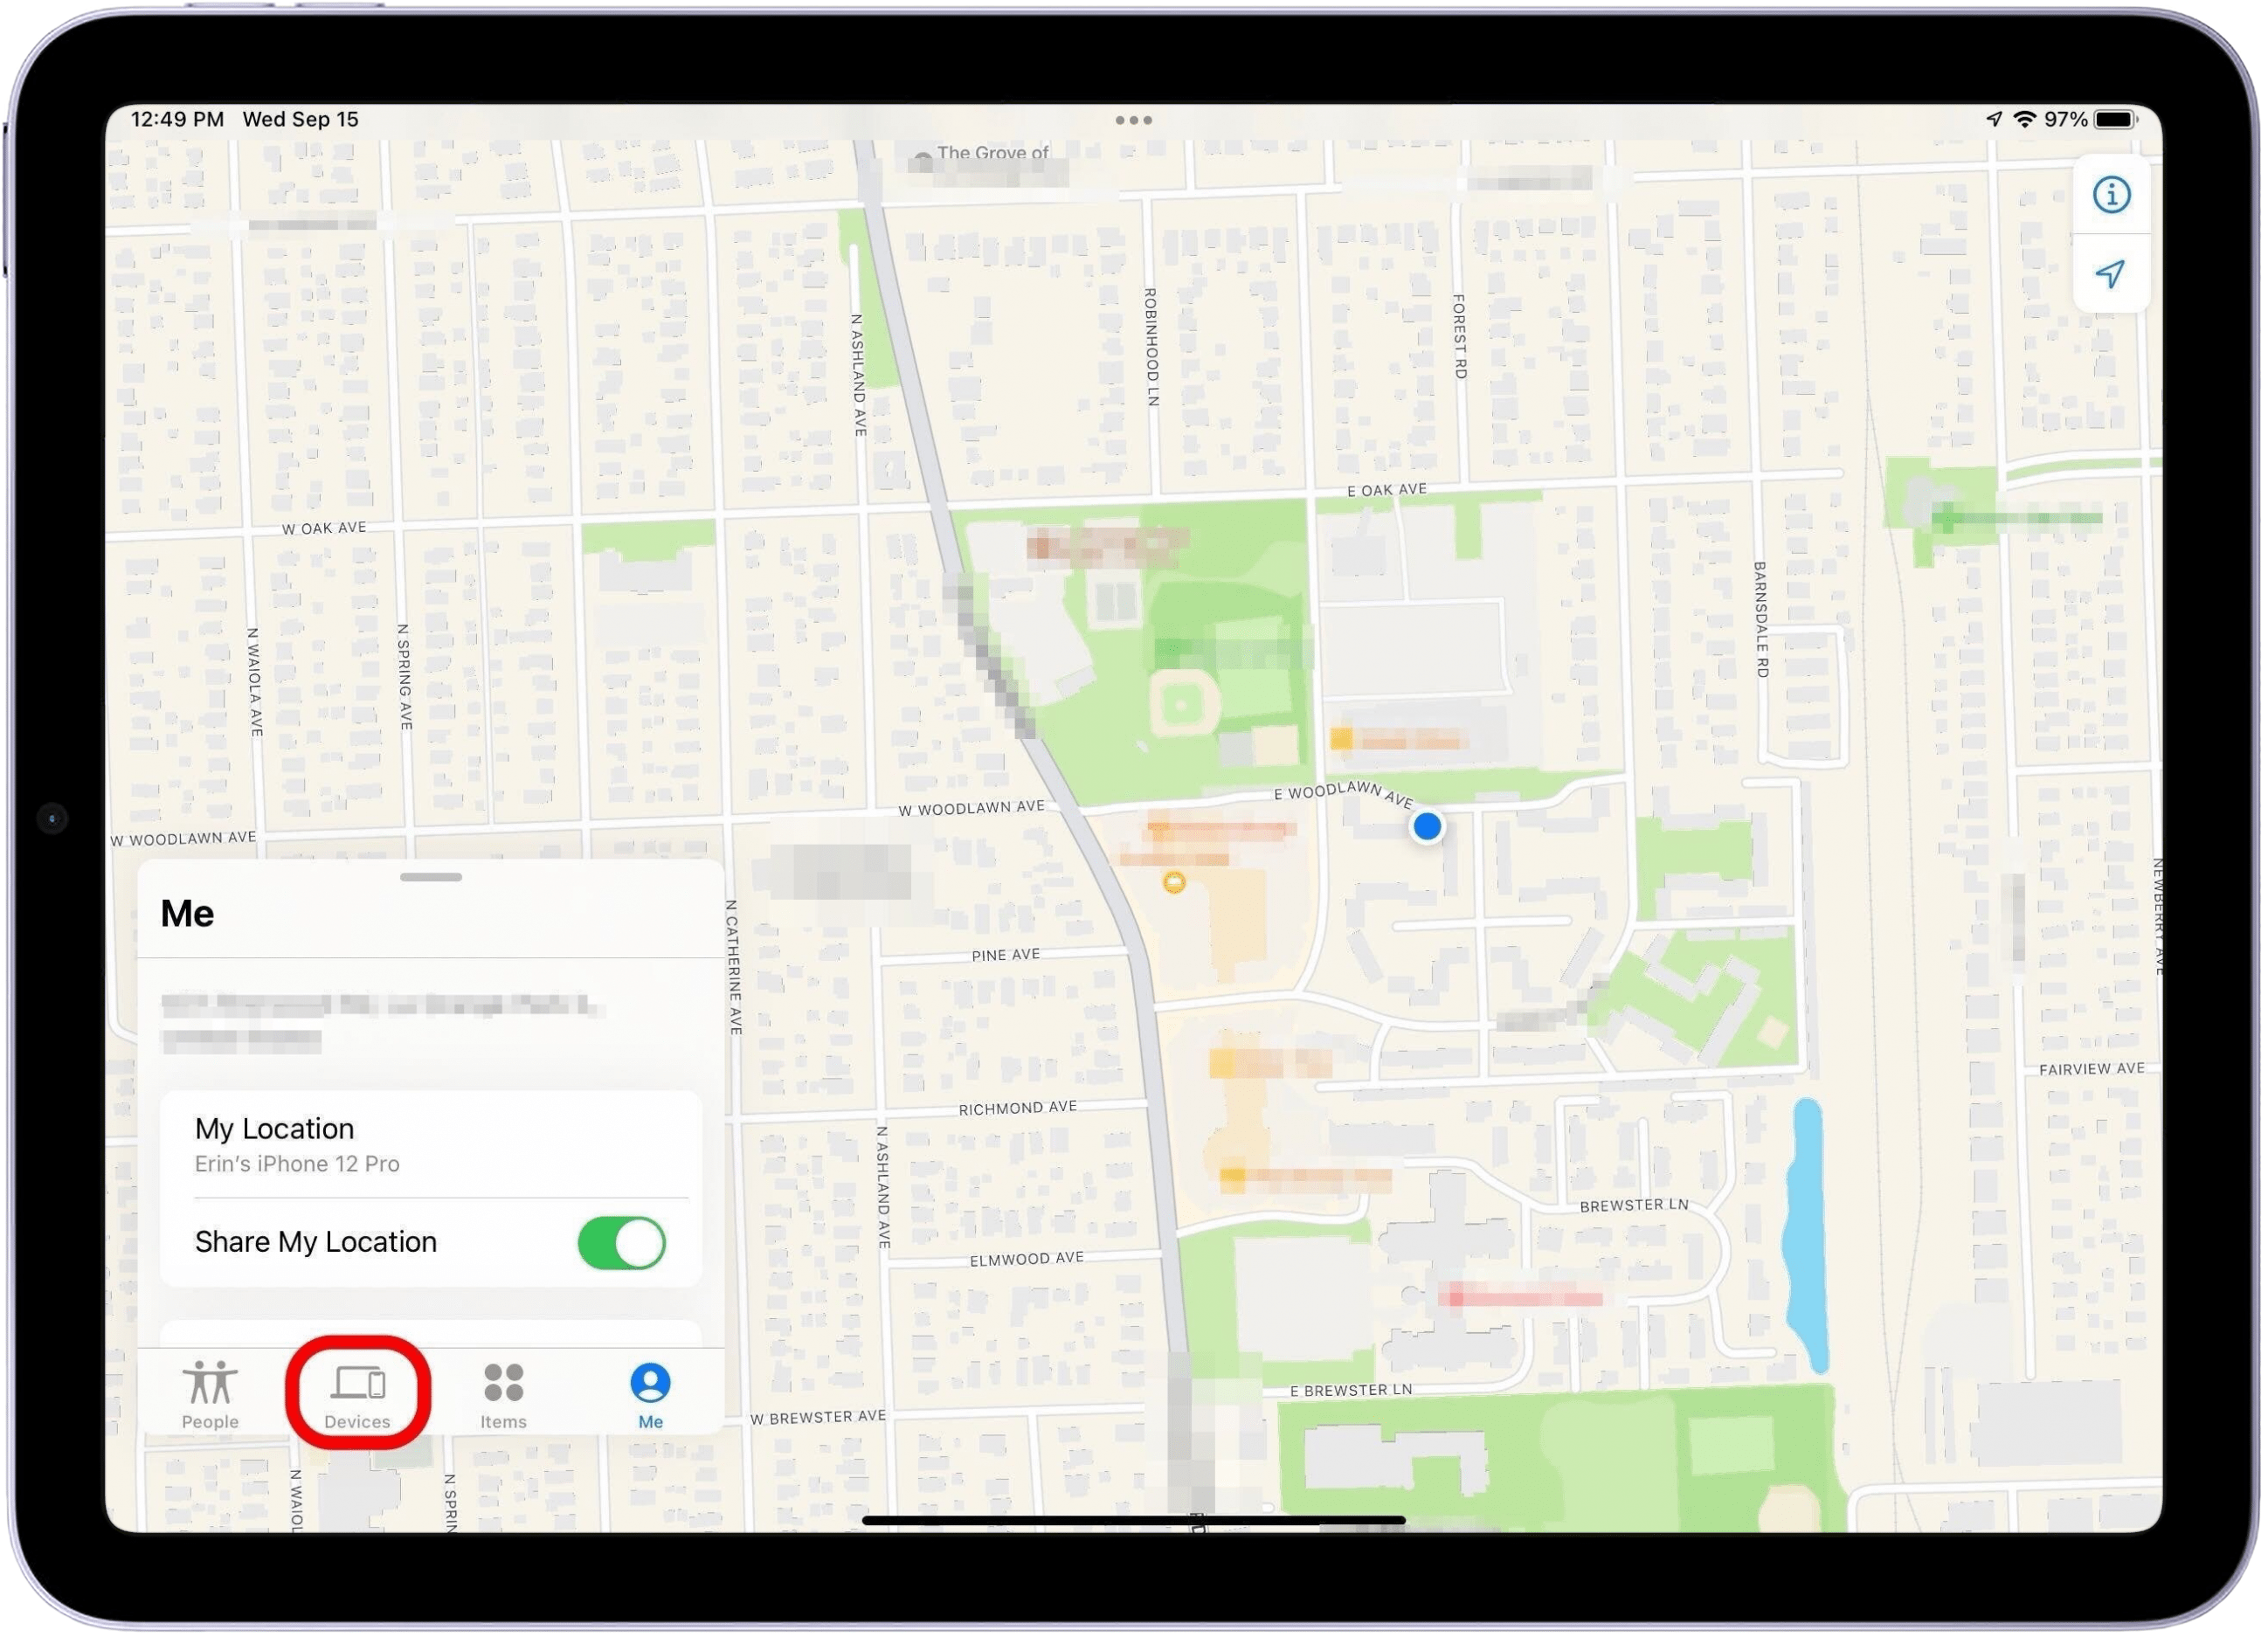
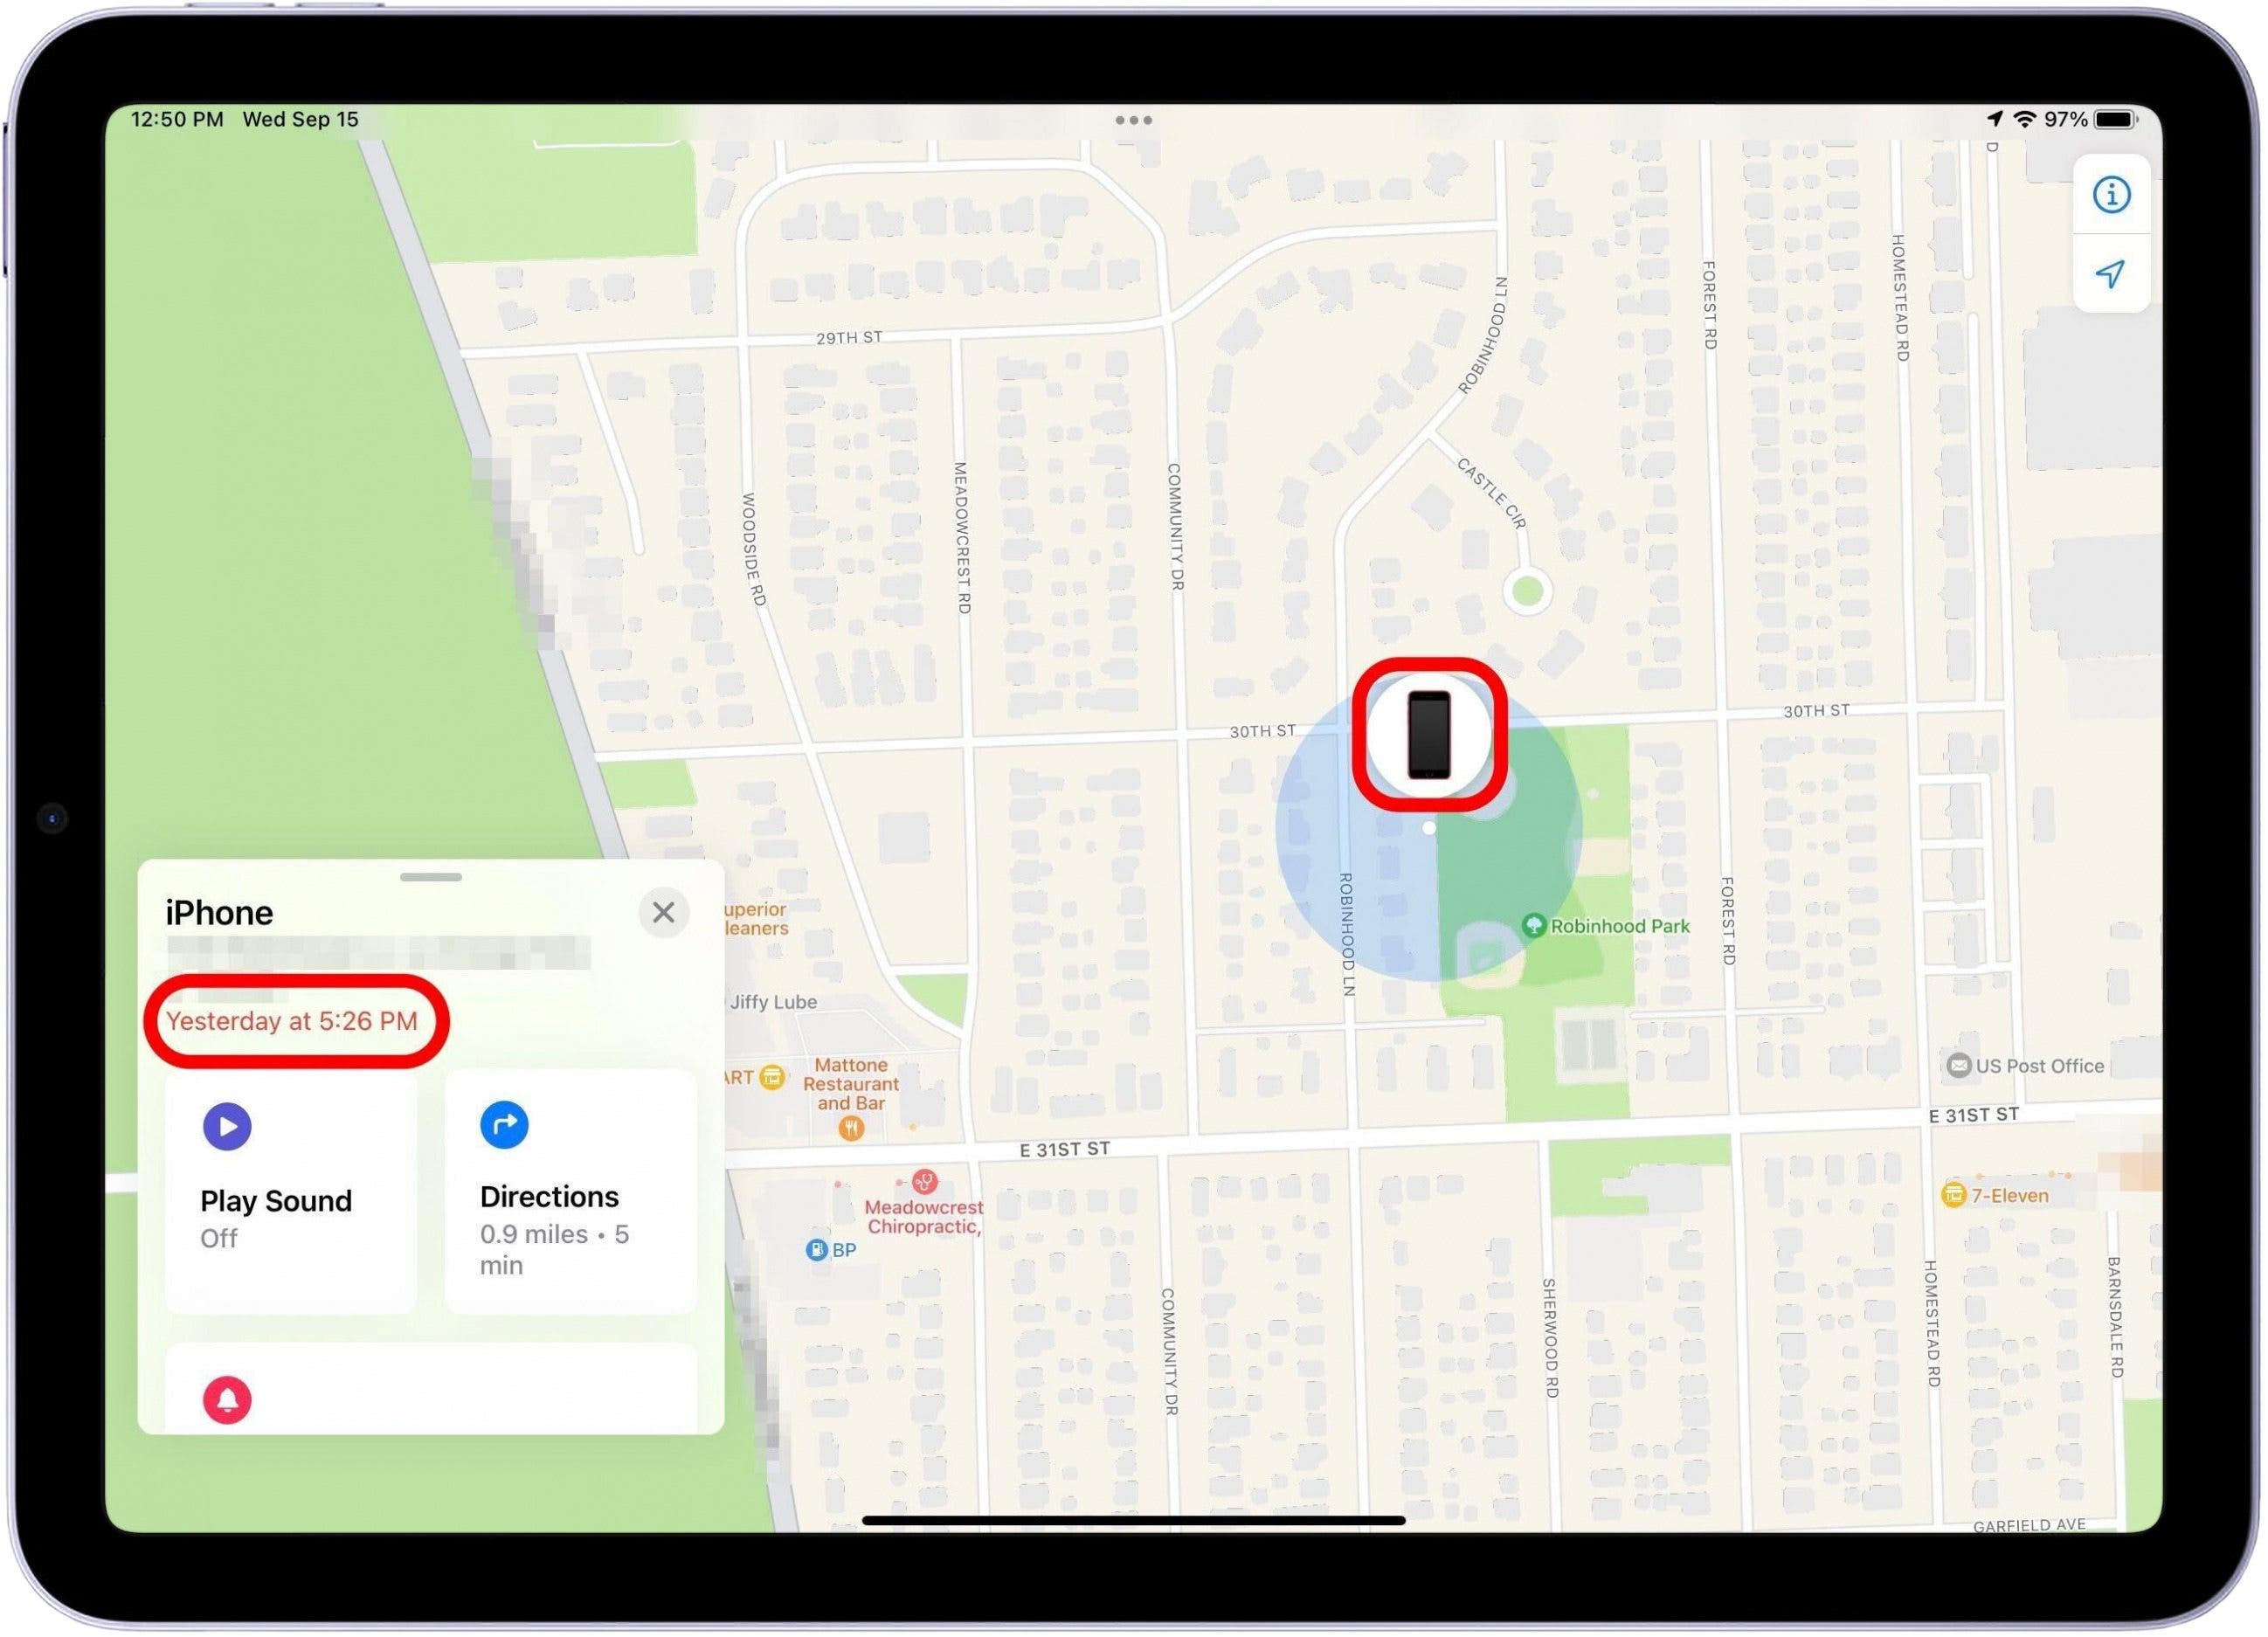
If you own an iPad or Mac or you can use one of those devices to find your lost iPhone. If your iPhone is offline, you'll still be able to track it as long as other Apple devices are nearby. If your iPhone is dead, you can view the last location before the battery died. Here's how to find your lost iPhone:
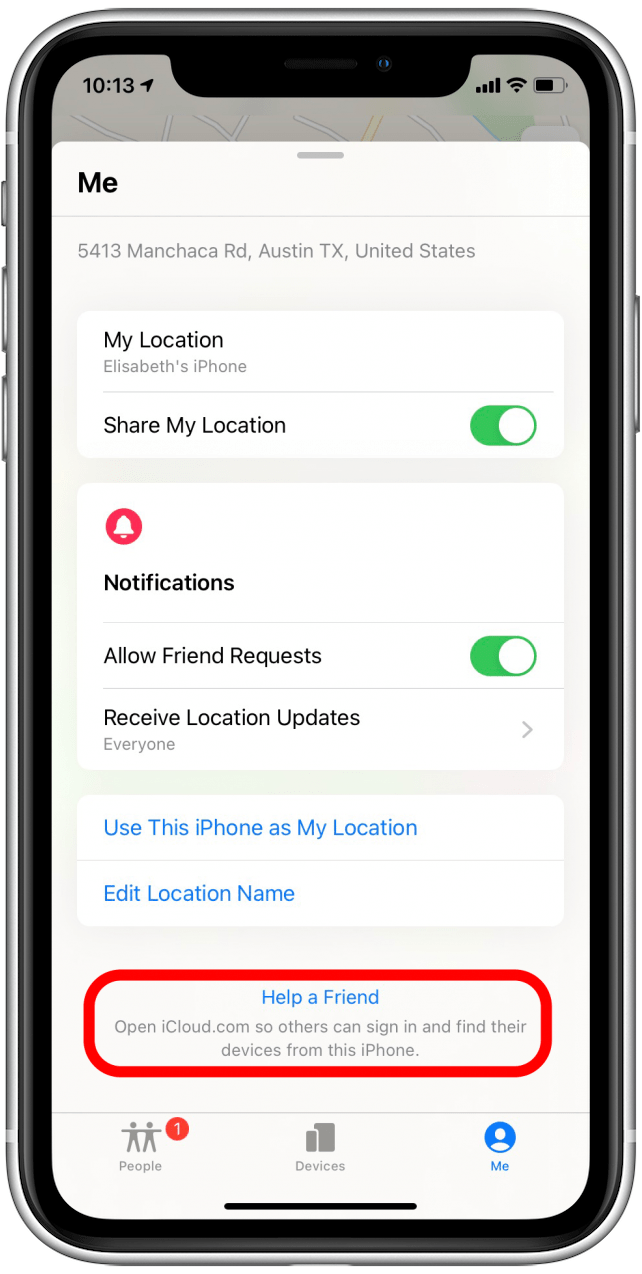
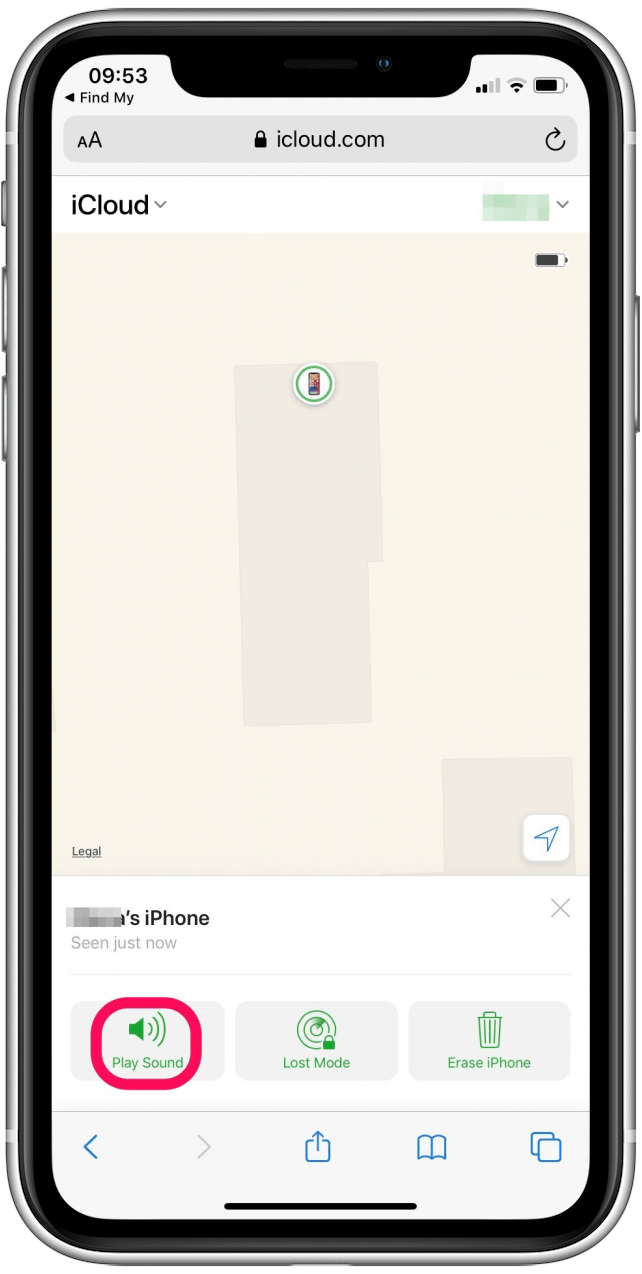
Have you ever been in a situation where you or a friend lost their iPhone? You can find a friend's iPhone (or find your own iPhone from someone else's iPhone) by signing into the Help a Friend feature within the Find My app.
Pro Tip: If your iPhone is turned on and in the same location as you, you don’t need the Find My app, instead, you can ping a lost iPhone with your Apple Watch.